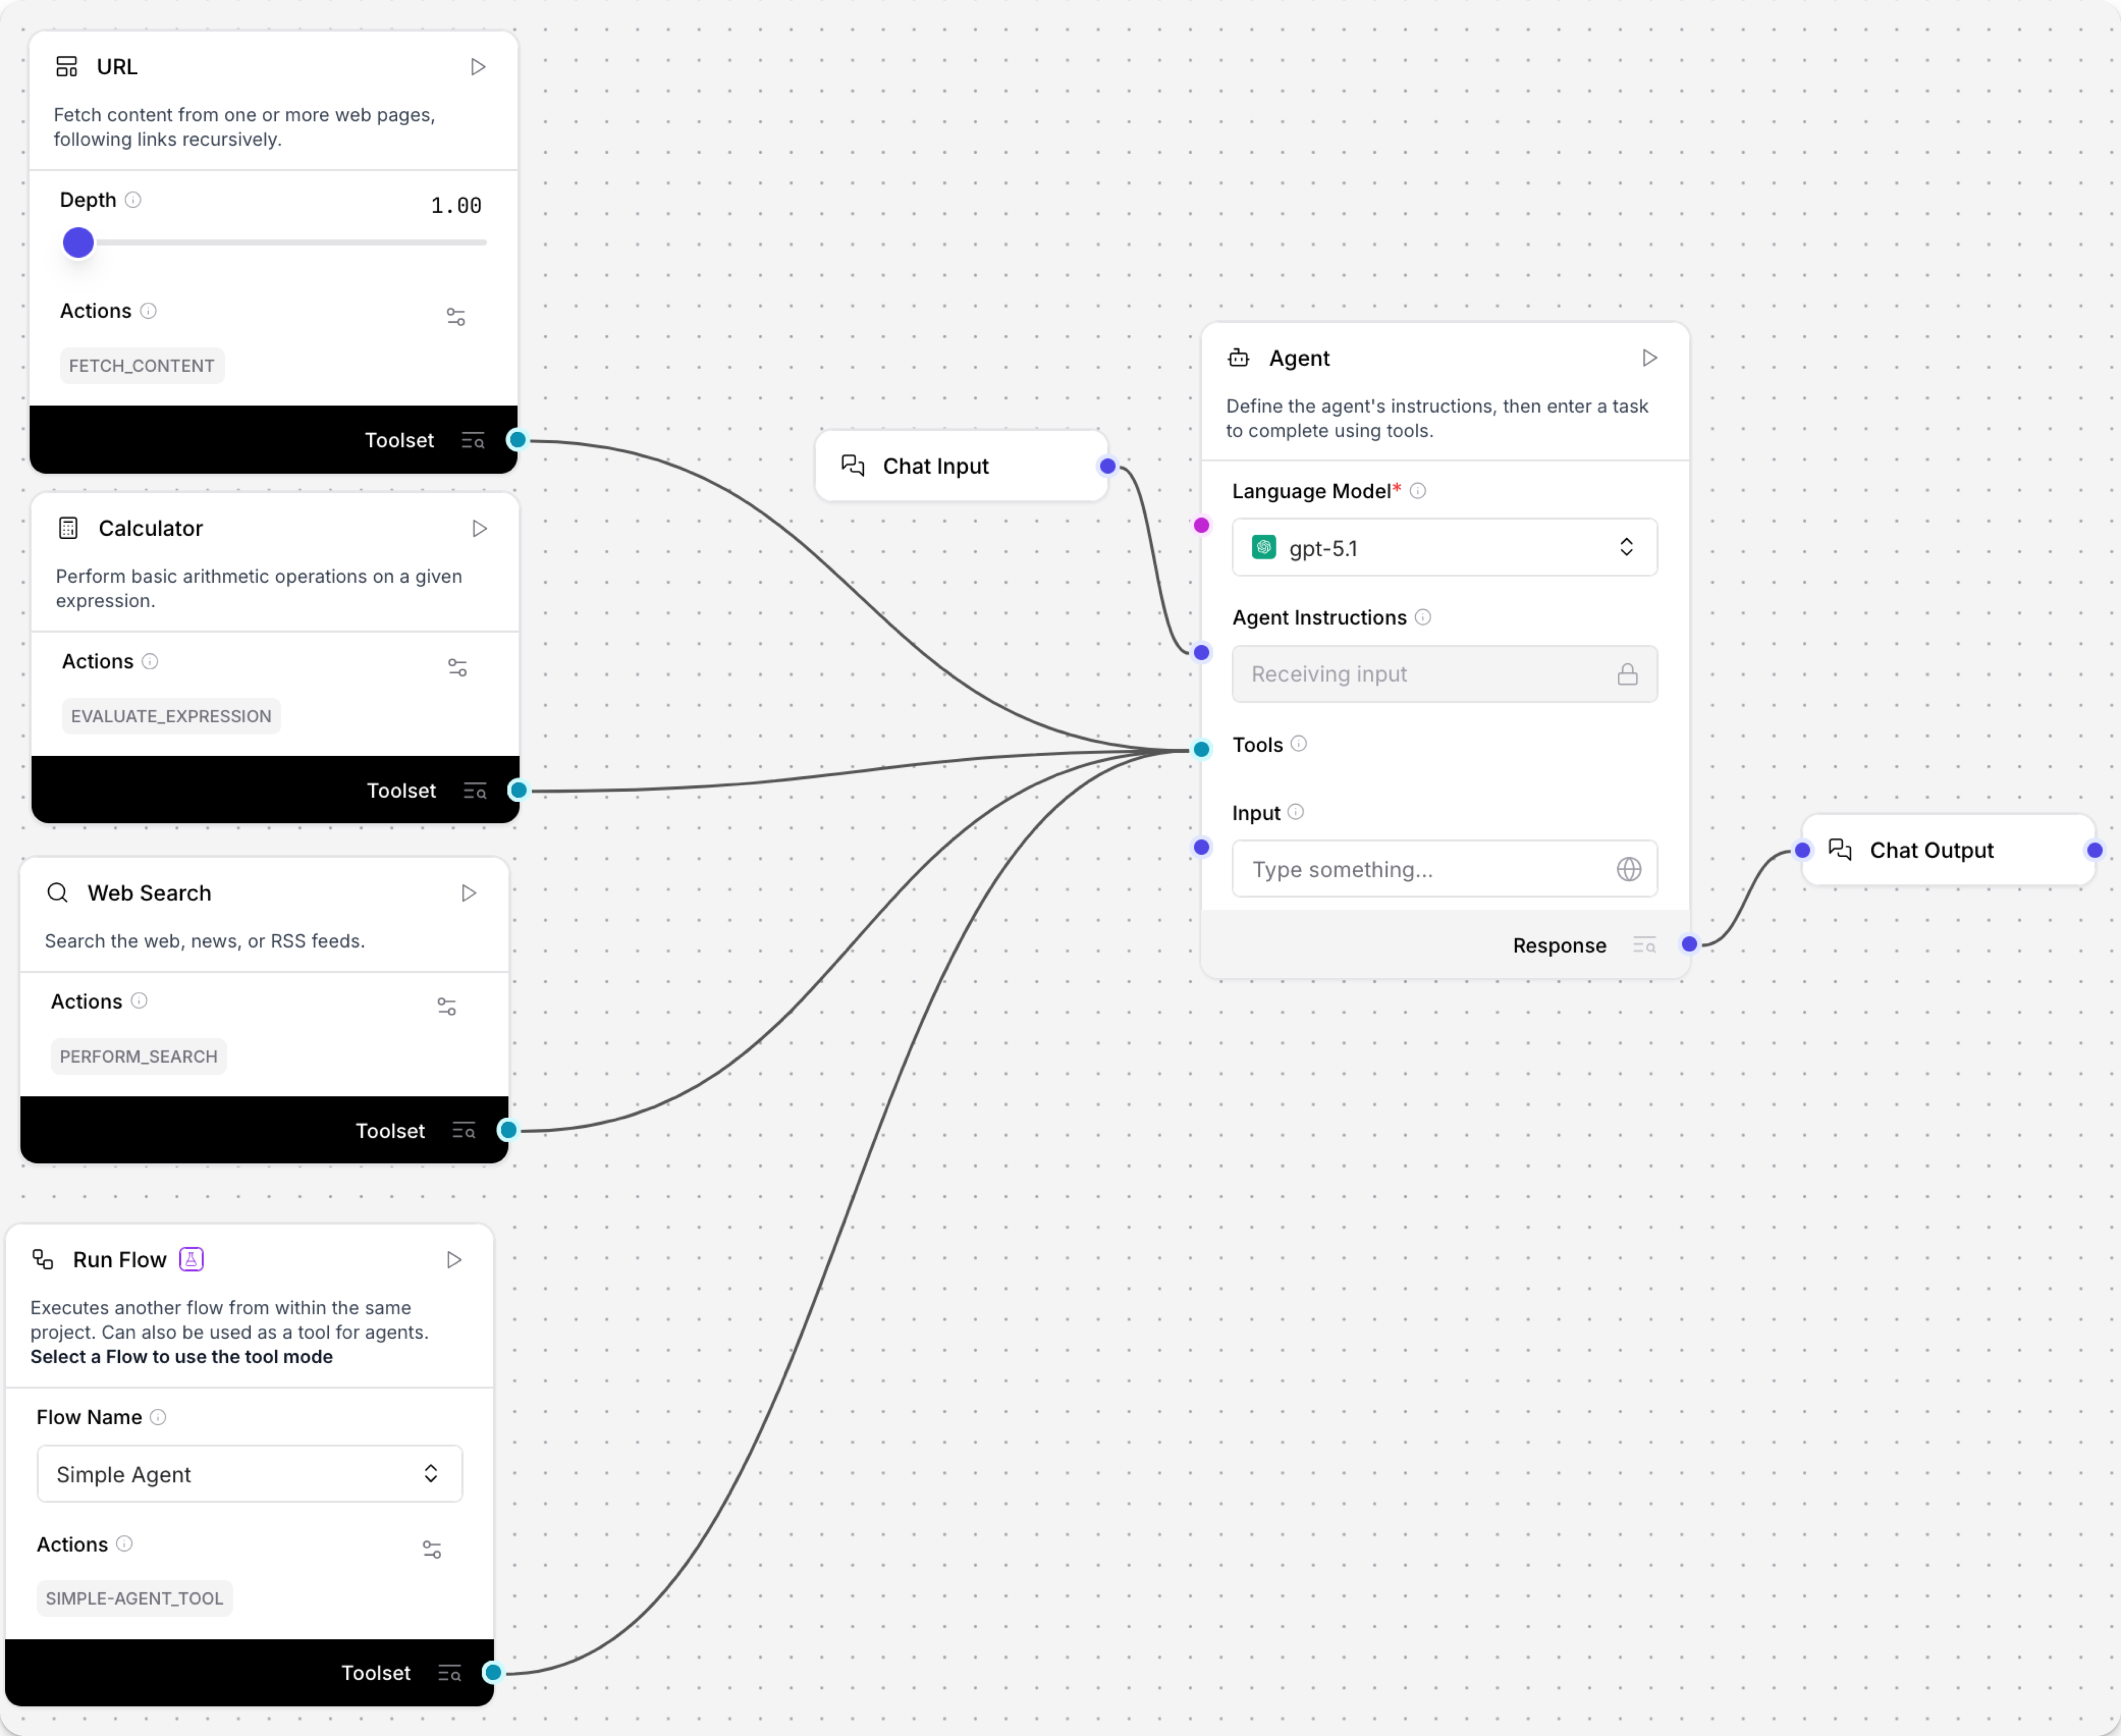
Configure tools for agents
By default, Langflow agents only include the functionality built-in to their base LLM.
You can attach tools to agents to provide access to additional, targeted functionality. For example, tools can be used to create domain-specific agents, such as a customer support agent that can access a company's knowledge base, a financial agent that can retrieve stock prices, or a math tutor agent that can use advanced math functions to solve complex equations.
Attach tools
To attach a tool to an agent, you connect any component's Tool output to the Agent component's Tools input.
Some components emit Tool output by default. For all other components, you must enable Tool Mode in the component's header menu. Then, you can connect the tool to the agent.
You can connect multiple tools to one agent, and each tool can have multiple actions (functions) that the agent can call.
When you run your flow, the agent decides when to call on certain tools, if it determines that a tool can help it respond to the user's prompt.
Edit a tool's actions
When you attach components to an agent as tools, each tool can have multiple actions (functions) that the agent can call. Available actions are listed in each tool component's Actions list.
You can change each action's labels, descriptions, and availability to help the agent understand how to use the tool and prevent it from using irrelevant or undesired actions.
If an agent seems to be using a tool incorrectly, try editing the actions metadata to clarify the tool's purpose and disable unnecessary actions.
You can also try using a Prompt Template component to pass additional instructions or examples to the agent.
To view and edit a tool's actions, click Edit Tool Actions on the tool component.
The following information is provided for each action:
-
Enabled: A checkbox that determines whether the action is available to the agent. If selected, the action is enabled. If not selected, the action is disabled.
-
Name: A human-readable string name for the action, such as
Fetch Content. This cannot be changed. -
Description: A human-readable description of the action's purpose, such as
Fetch content from web pages recursively. To edit this value, double-click the action's row to open the edit pane. Changes are saved automatically when you click out of the field or close the dialog. -
Slug: An encoded name for the action, usually the same as the name but in snake case, such as
fetch_content. To edit this value, double-click the action's row to open the edit pane. Changes are saved automatically when you click out of the field or close the dialog.
Some actions allow you to provide fixed values for their inputs. Typically, you want to leave these blank so the agent can provide its own values. However, you might use a fixed value if you're trying to debug an agent's behavior or your use case requires a fixed input for an action.
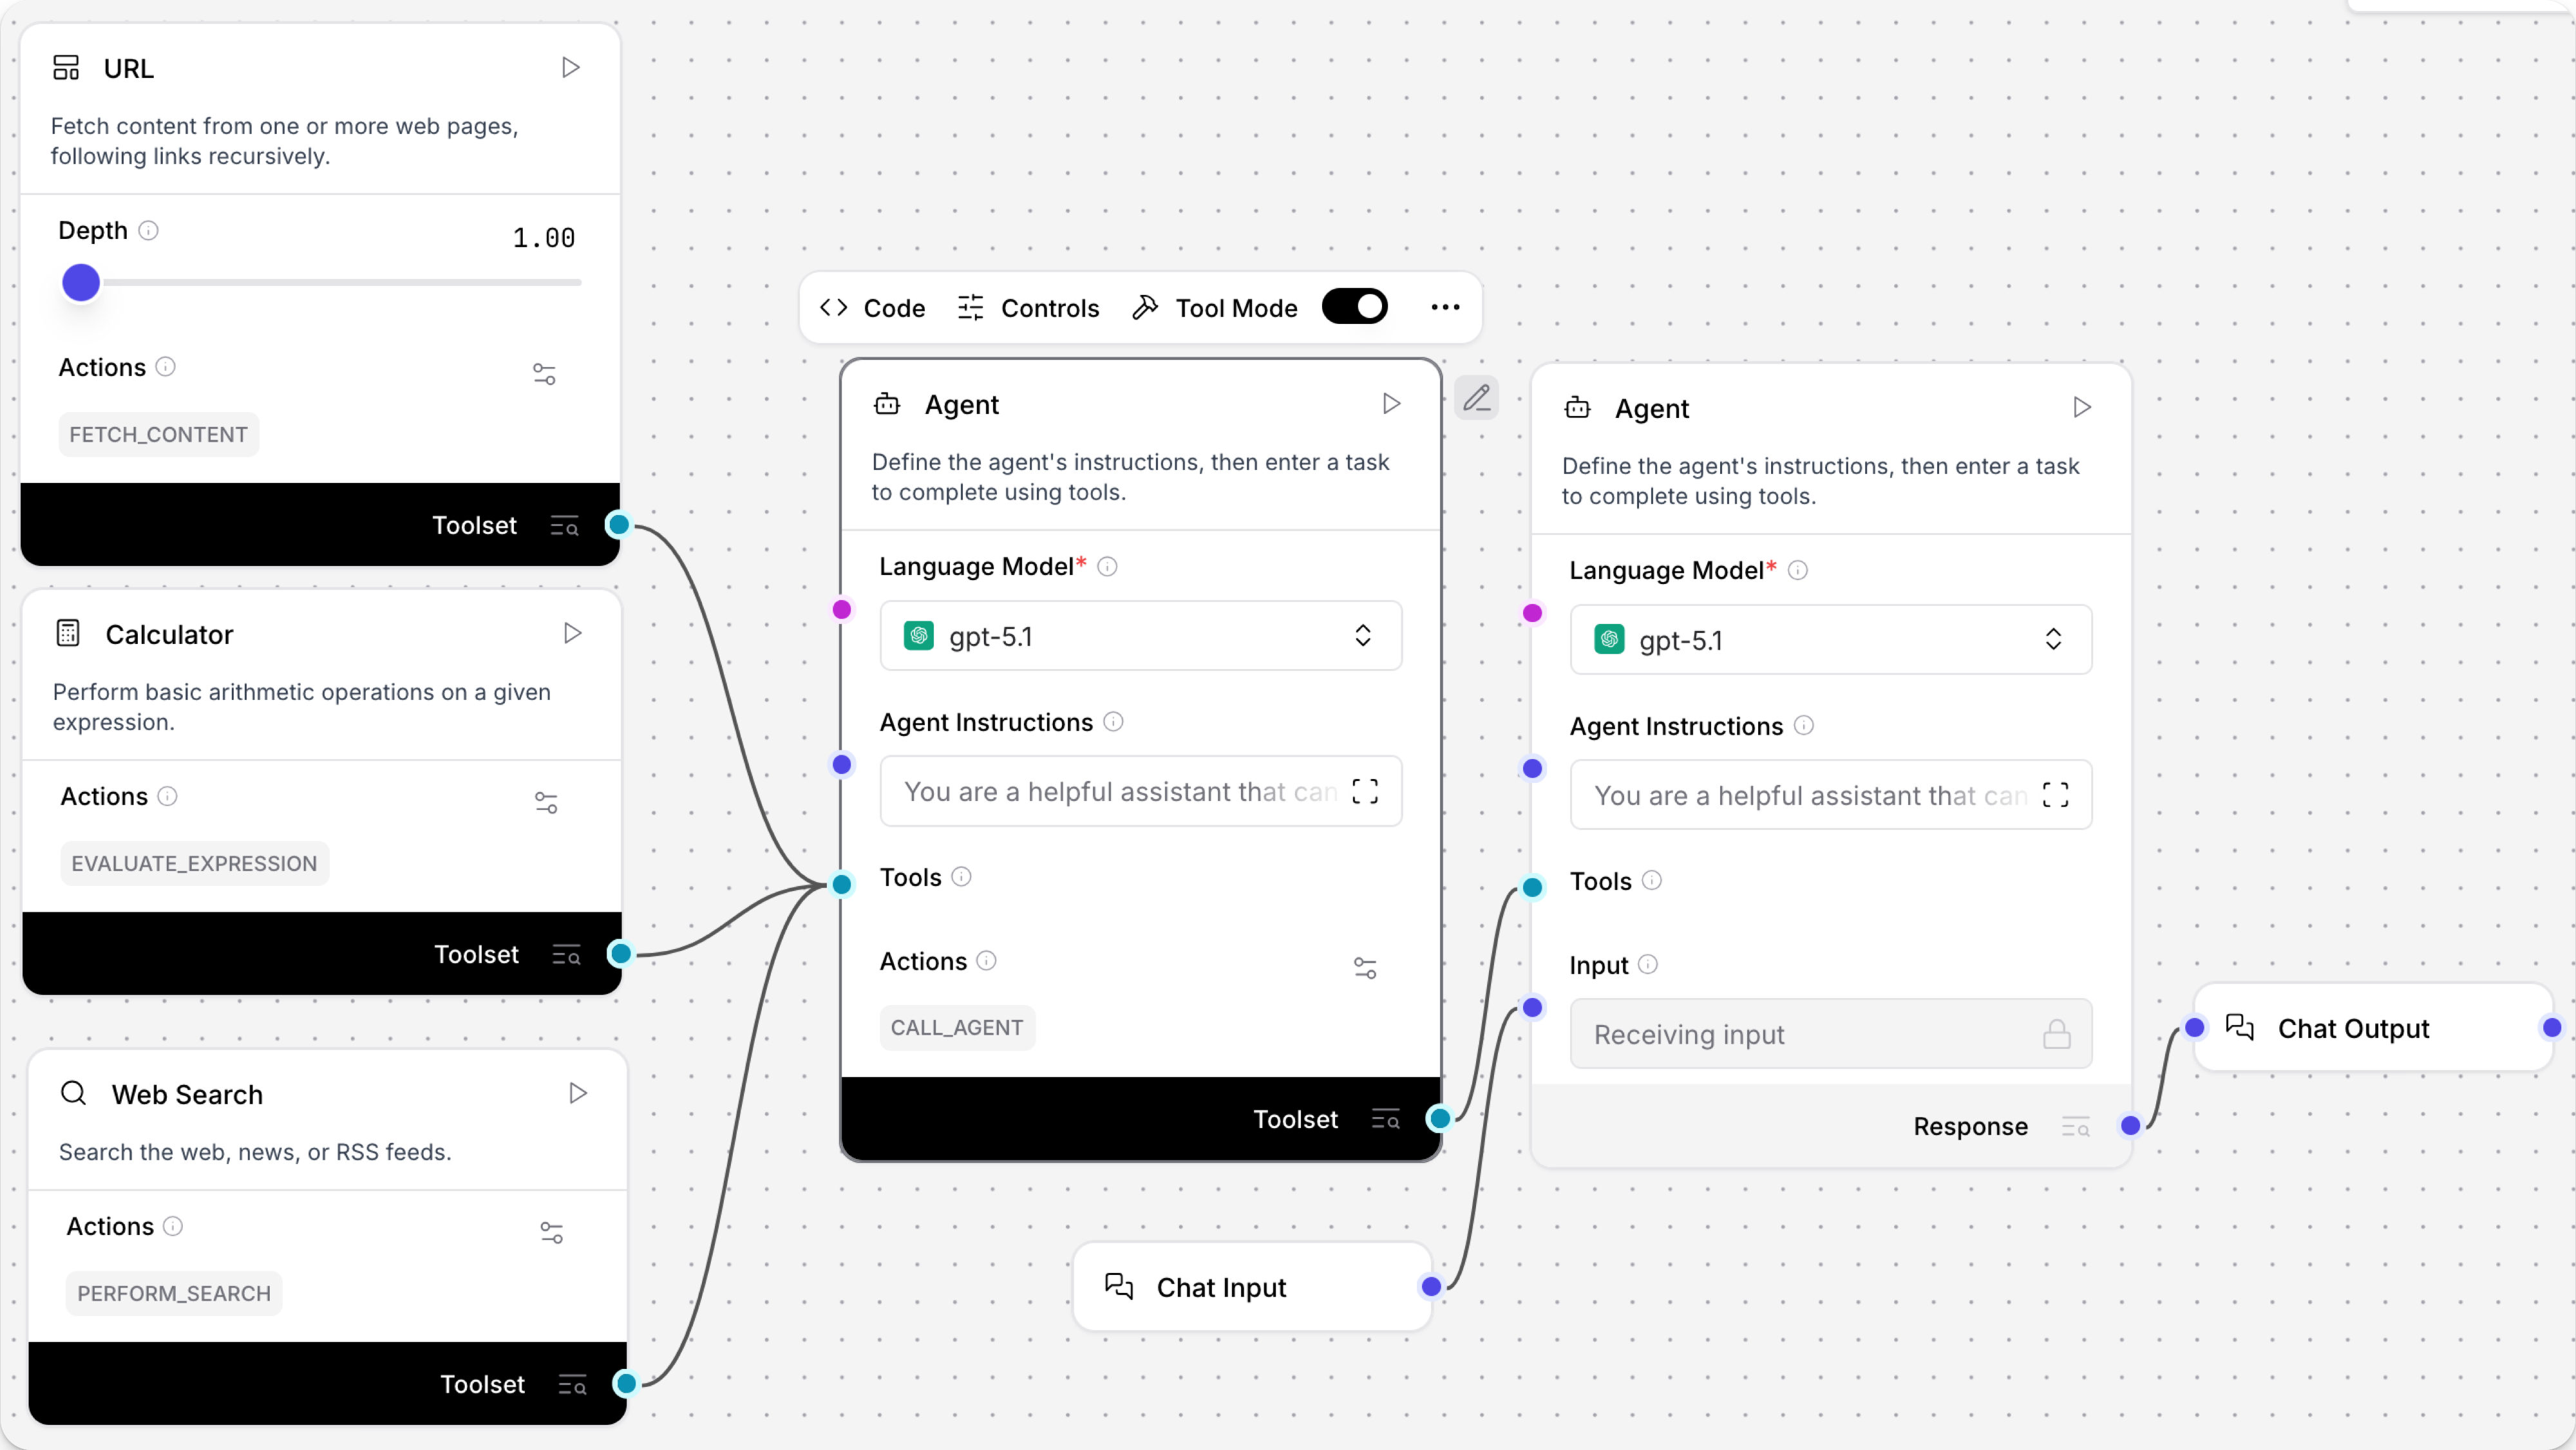
Use an agent as a tool
To create multi-agent flows, you can set another Agent component to Tool Mode, and then attach that agent as a tool for your primary Agent component.
To try this for yourself, add an additional agent to the Simple Agent template:
-
Create a flow based on the Simple Agent template.
-
Add a second Agent component to the flow.
-
Add your OpenAI API Key to both Agent components.
-
In the second Agent component, change the model to
gpt-4.1, and then enable Tool Mode. -
Click Edit Tool Actions to edit the tool's actions.
For this example, change the action's slug to
Agent-gpt-41, and set the description toUse the gpt-4.1 model for complex problem solving. This lets the primary agent know that this tool uses thegpt-4.1model, which could be helpful for tasks requiring a larger context window, such as large scrape and search tasks.As another example, you could attach several specialized models to a primary agent, such as agents that are trained on certain tasks or domains, and then the primary agent would call each specialized agent as needed to respond to queries.
You can also enable and disable tools if you want to limit the available toolset.
-
Connect the new agent's Toolset port to the existing agent's Tools port.
Add custom components as tools
An agent can use custom components as tools.
-
To add a custom component to an agent flow, click New Custom Component in the Core components or Bundles menus.
-
Enter Python code into the Code pane to create the custom component.
If you don't already have code for a custom component, you can use the following code snippet as an example before creating your own.
Text Analyzer custom component
This code creates a text analyzer component.
_50from langflow.custom import Component_50from langflow.io import MessageTextInput, Output_50from langflow.schema import Data_50import re_50_50class TextAnalyzerComponent(Component):_50display_name = "Text Analyzer"_50description = "Analyzes and transforms input text."_50documentation: str = "http://docs.langflow.org/components/custom"_50icon = "chart-bar"_50name = "TextAnalyzerComponent"_50_50inputs = [_50MessageTextInput(_50name="input_text",_50display_name="Input Text",_50info="Enter text to analyze",_50value="Hello, World!",_50tool_mode=True,_50),_50]_50_50outputs = [_50Output(display_name="Analysis Result", name="output", method="analyze_text"),_50]_50_50def analyze_text(self) -> Data:_50text = self.input_text_50_50# Perform text analysis_50word_count = len(text.split())_50char_count = len(text)_50sentence_count = len(re.findall(r'\w+[.!?]', text))_50_50# Transform text_50reversed_text = text[::-1]_50uppercase_text = text.upper()_50_50analysis_result = {_50"original_text": text,_50"word_count": word_count,_50"character_count": char_count,_50"sentence_count": sentence_count,_50"reversed_text": reversed_text,_50"uppercase_text": uppercase_text_50}_50_50data = Data(value=analysis_result)_50self.status = data_50return data -
Enable Tool Mode in the custom component.
-
Connect the custom component's tool output to the Agent component's Tools input.
-
Open the Playground and instruct the agent,
Use the text analyzer on this text: "Agents really are thinking machines!"Based on your instruction, the agent should call the
analyze_textaction and return the result. For example:_10gpt-4o_10Finished_100.6s_10Here is the analysis of the text "Agents really are thinking machines!":_10Original Text: Agents really are thinking machines!_10Word Count: 5_10Character Count: 36_10Sentence Count: 1_10Reversed Text: !senihcam gnikniht era yllaer stnegA_10Uppercase Text: AGENTS REALLY ARE THINKING MACHINES!
Make any component a tool
If the component you want to use as a tool doesn't have a Tool Mode button, add tool_mode=True to one of the component's inputs, and connect the new Toolset output to the agent's Tools input.
Langflow supports Tool Mode for the following data types:
DataInputDataFrameInputPromptInputMessageTextInputMultilineInputDropdownInput
For example, the example code in Use custom components as tools included tool_mode=True to the MessageTextInput input so the custom component could be used as a tool:
_10inputs = [_10 MessageTextInput(_10 name="input_text",_10 display_name="Input Text",_10 info="Enter text to analyze",_10 value="Hello, World!",_10 tool_mode=True,_10 ),_10]
Use flows as tools
An agent can use your other flows as tools with the Run Flow component.
- Add a Run Flow component to your flow.
- Select the flow you want the agent to use as a tool.
- Enable Tool Mode. The selected flow becomes an action in the Run Flow component.
- Connect the Run Flow component's Tool output to the Agent component's Tools input.
- Open the Playground, and then ask the agent,
What tools are you using to answer my questions?Your flow should be visible in the response as an available tool. - Ask the agent a question that specifically uses the connected flow as a tool. The connected flow returns an answer based on your question.