Use Langflow as an MCP server
Langflow integrates with the Model Context Protocol (MCP) as both an MCP server and an MCP client.
This page describes how to use Langflow as an MCP server that exposes your flows as tools that MCP clients can use when generating responses.
Langflow MCP servers support both the streamable HTTP transport and Server-Sent Events (SSE) as a fallback.
The default project MCP server configuration uses streamable HTTP transport at the URL path /streamable.
For information about using Langflow as an MCP client and managing MCP server connections within flows, see Use Langflow as an MCP client.
Prerequisites
-
A Langflow project with at least one flow that has a Chat Output component.
The Chat Output component is required to use a flow as an MCP tool.
-
Any LTS version of Node.js installed on your computer if you want to use MCP Inspector to test and debug flows.
-
ngrok installed and an ngrok authtoken if you want to deploy a public Langflow server.
Serve flows as MCP tools
When you create a Langflow project, Langflow automatically adds the project to your MCP server's configuration and makes the project's flows available as MCP tools.
If your Langflow server has authentication enabled (AUTO_LOGIN=false), the project's MCP server is automatically configured with API key authentication, and a new API key is generated specifically for accessing the new project's flows.
For more information, see MCP server authentication.
Prevent automatic MCP server configuration for Langflow projects
To disable automatic MCP server configuration for new projects, set the LANGFLOW_ADD_PROJECTS_TO_MCP_SERVERS environment variable to false.
For more information, see MCP server environment variables.
Selectively enable and disable MCP servers for Langflow projects
With or without automatic MCP server configuration enabled, you can selectively enable and disable the projects that are exposed as MCP tools:
-
Click the MCP Server tab on the Projects page, or, when editing a flow, click Share, and then select MCP Server.
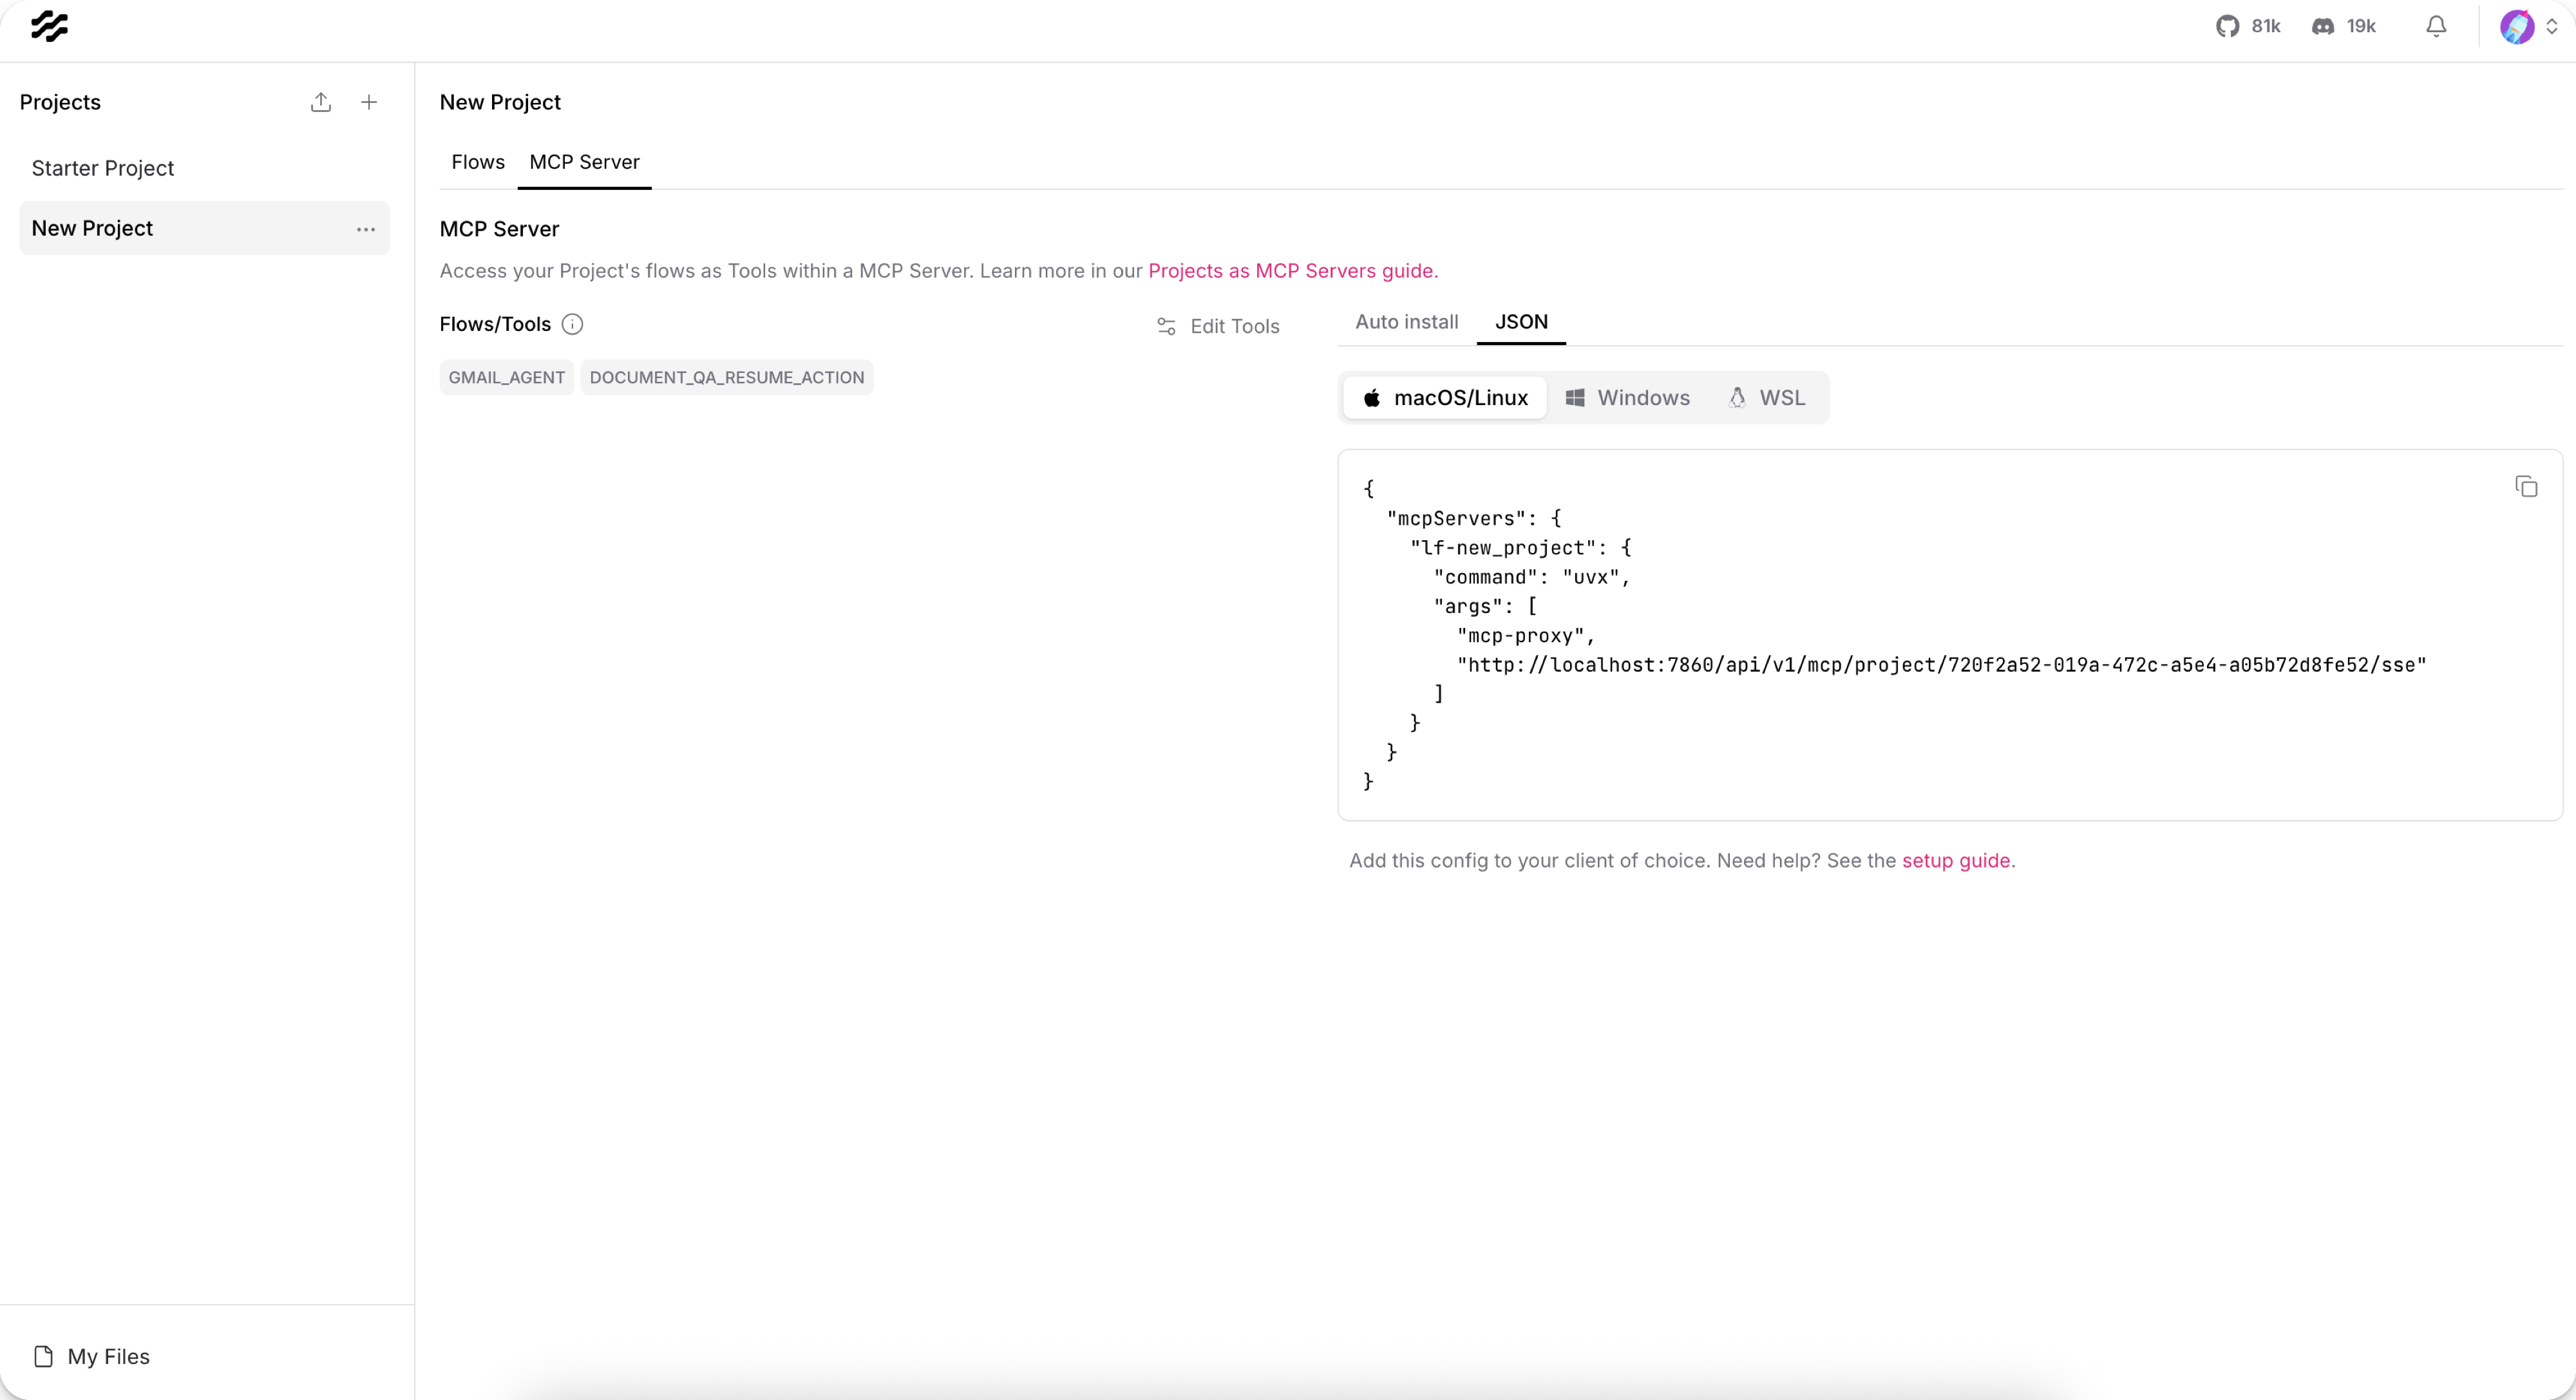
The Flows/Tools section lists the flows that are currently being served as tools on this MCP server.
-
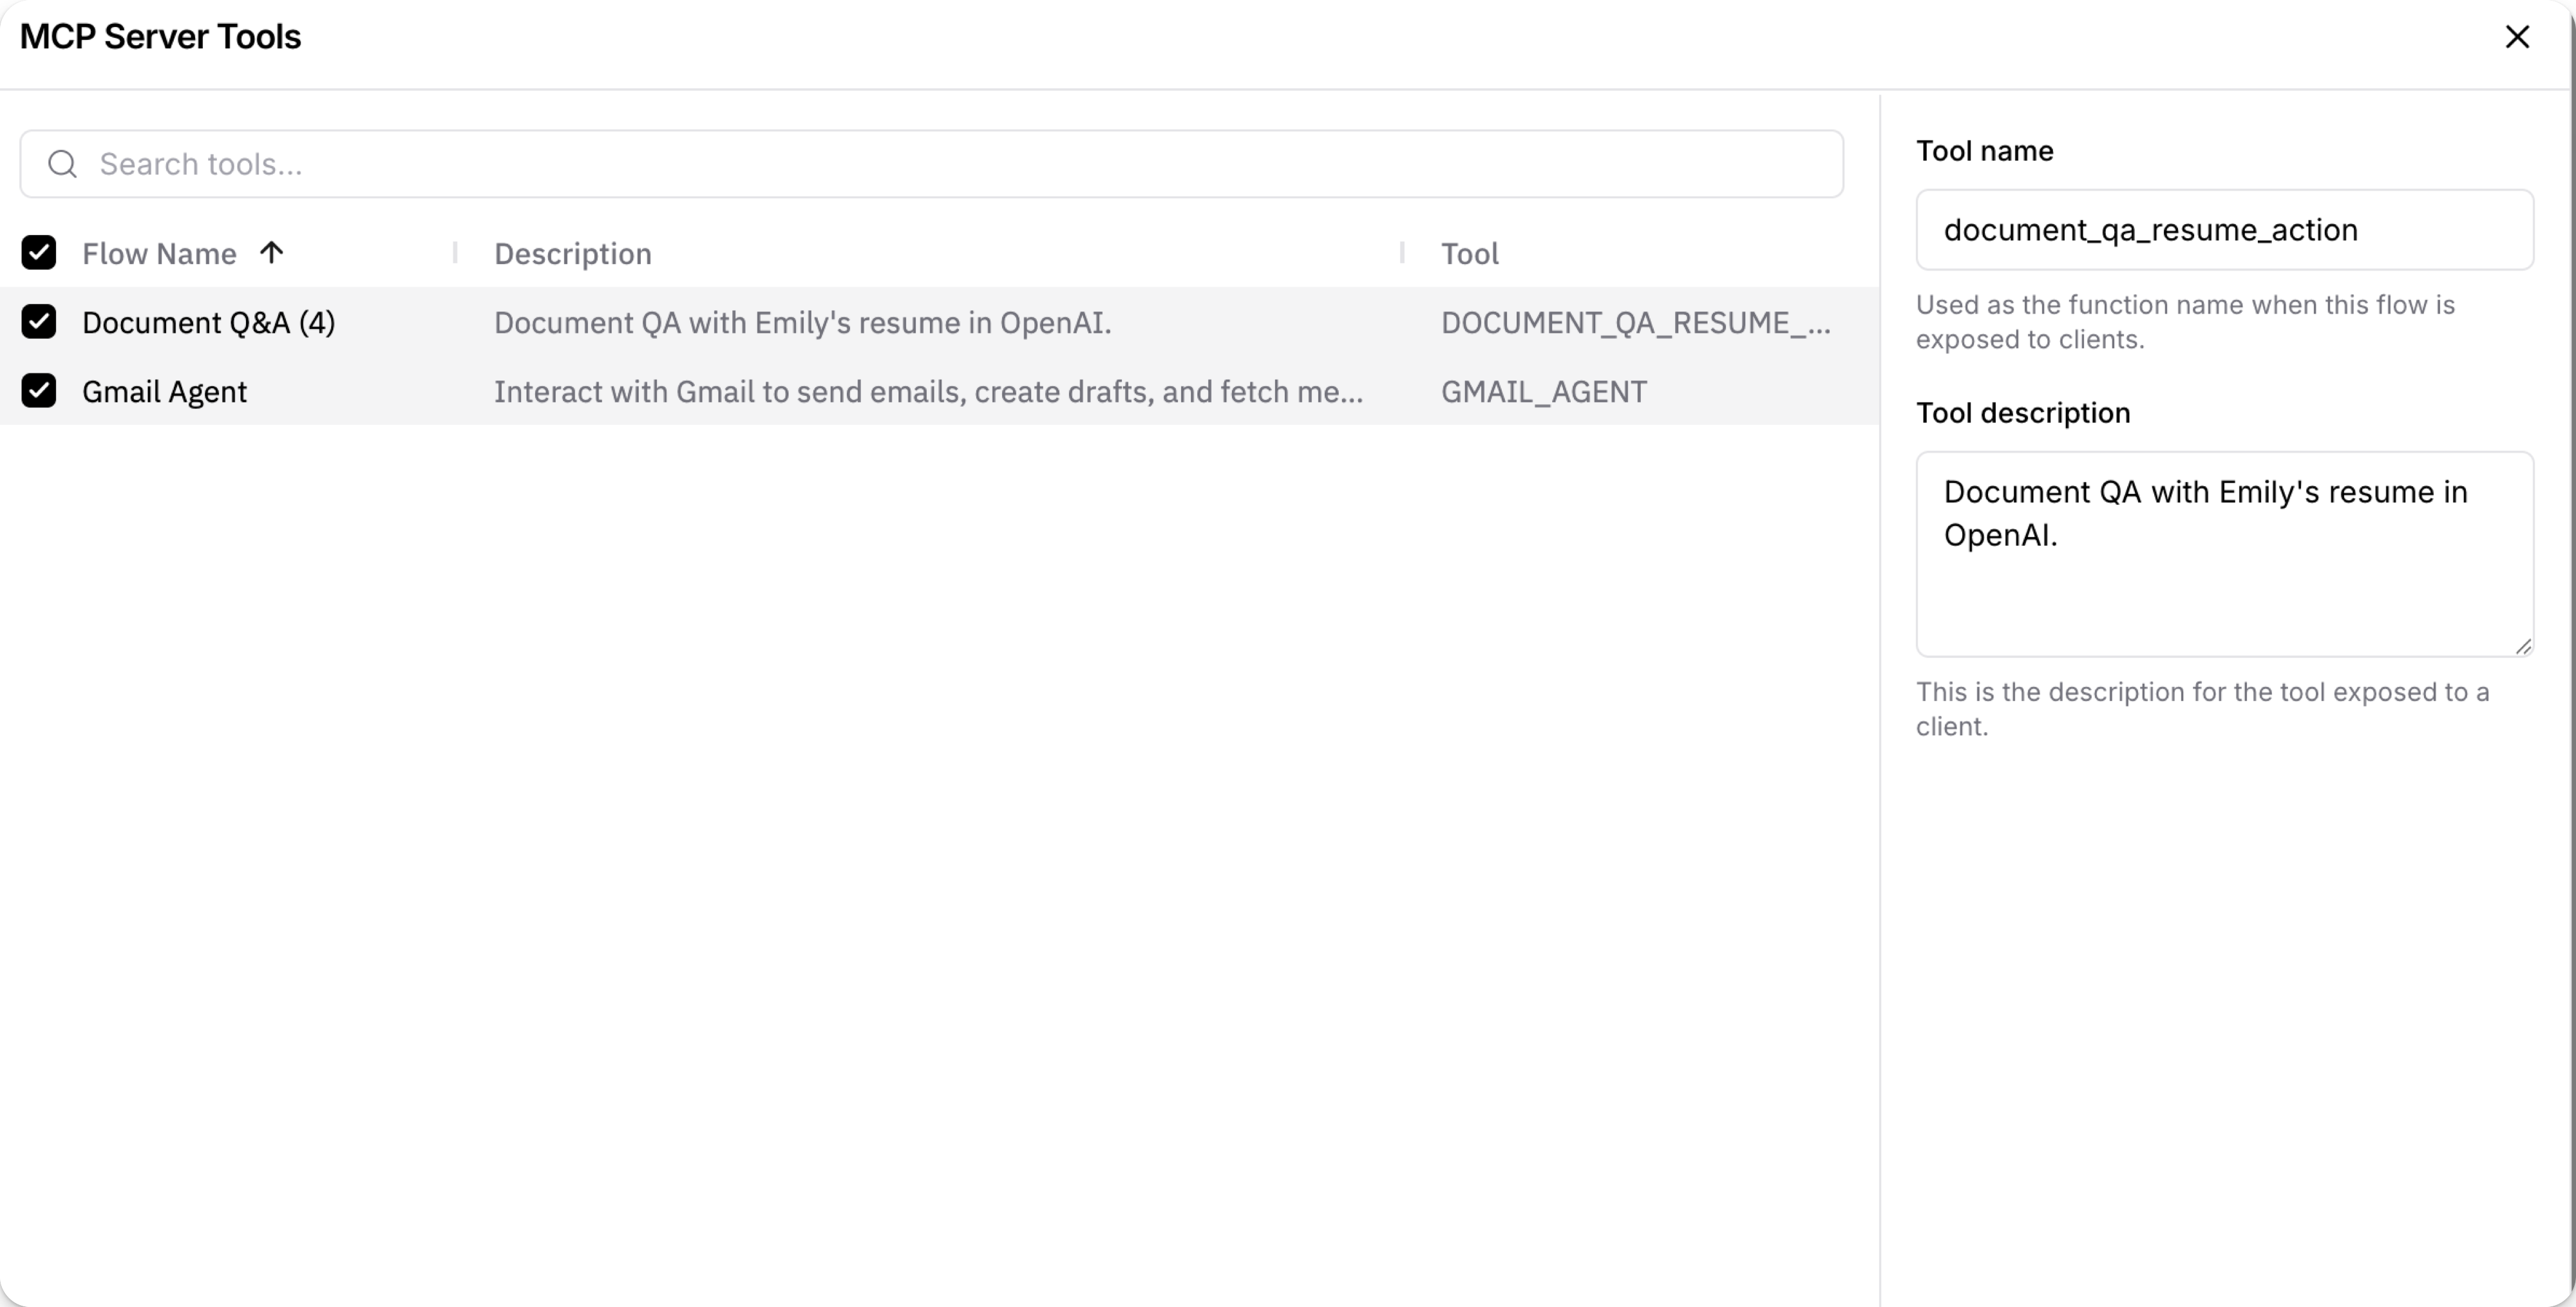
To toggle exposed flows, click Edit Tools, and then select the flows that you want exposed as tools. To prevent a flow from being used as a tool, clear the checkbox in the first column.
-
Close the MCP Server Tools dialog to save your changes.
Edit flow tool names and descriptions
Tool names and descriptions help MCP clients determine which actions your flows provide and when to use those actions. It is recommended to provide clear, descriptive names and descriptions for all tools that you serve to MCP clients.
To edit the names and descriptions of flow tools on a Langflow MCP server, do the following:
-
Click the MCP Server tab on the Projects page, or, when editing a flow, click Share, and then select MCP Server.
-
Click Edit Tools.
-
Click the Description or Tool that you want to edit:
-
Tool name: Enter a name that makes it clear what the flow does when used as a tool by an agent.
-
Tool description: Enter a description that completely and accurately describes the specific actions the flow performs.
-
-
Close the MCP Server Tools dialog to save your changes.
Importance of tool names and descriptions
MCP clients use tool names and descriptions to determine which actions to use when generating responses.
Because MCP clients treat your Langflow project as a single MCP server with all of your enabled flows listed as tools, unclear names and descriptions can cause the agent to select tools incorrectly or inconsistently.
For example, a flow's default tool name is the flow ID, such as adbbf8c7-0a34-493b-90ea-5e8b42f78b66.
This provides no information to an agent about the type of flow or its purpose.
To provide more context about your flows, make sure to name and describe your flows clearly when configuring your Langflow project's MCP server.
Think of these names and descriptions as function names and code comments. Use clear statements to describe the problems your flows solve.
Example: Tool name and description usage
For example, assume you create a flow based on the Document Q&A template that uses an LLM to chat about resumes, and then you give the flow the following name and description:
-
Tool name:
document_qa_for_resume -
Tool description:
A flow for analyzing Emily's resume.
After connecting your Langflow MCP server to Cursor, you can ask Cursor about the resume, such as What job experience does Emily have?.
Using the context provided by your tool name and description, the agent can decide to use the document_qa_for_resume MCP tool to create a response about Emily's resume.
If necessary, the agent asks permission to use the flow tool before generating the response.
If you ask about a different resume, such as What job experience does Alex have?, the agent can decide that document_qa_for_resume isn't relevant to this request, because the tool description specifies that the flow is for Emily's resume.
In this case, the agent might use another available tool, or it can inform you that it doesn't have access to information about Alex's.
For example:
I notice you're asking about Alex's job experience.
Based on the available tools, I can see there is a Document QA for Resume flow that's designed for analyzing resumes.
However, the description mentions it's for "Emily's resume" not Alex's. I don't have access to Alex's resume or job experience information.
Configure tool execution timeouts
There are three ways to set tool execution timeouts: the MCP Tools component timeout setting, a global environment variable, and Langflow's default fallback. How you configure these determines their effect in resolving the actual timeout limit for each tool call.
Langflow times are evaluated in the following order:
-
Per-component timeout is set directly on an MCP Tools component in your flow. To configure per-component timeout in the MCP Tools component, open the advanced settings tab and enter a value in the Tool Execution Timeout (seconds) field. A value of
0disables the per-component override and falls back to the global setting. -
Global timeout is set with the
LANGFLOW_MCP_TOOL_EXECUTION_TIMEOUTenvironment variable. The default is 180 seconds. -
If neither
LANGFLOW_MCP_TOOL_EXECUTION_TIMEOUTorLANGFLOW_MCP_SERVER_TIMEOUTis configured, Langflow defaults to 180 seconds.
To support tool calls that take longer than 180 seconds, set LANGFLOW_MCP_TOOL_EXECUTION_TIMEOUT to a value greater than 180 to raise the global limit, or set the Tool Execution Timeout (seconds) field on a specific MCP Tools component to a value greater than 180 to raise the limit for that component only.
If LANGFLOW_MCP_SERVER_TIMEOUT is set to a value greater than LANGFLOW_MCP_TOOL_EXECUTION_TIMEOUT, the server timeout takes precedence and becomes the actual limit for tool calls.
Connect clients to your Langflow MCP server
Langflow provides automatic installation and code snippets to help you deploy your Langflow MCP servers to your local MCP clients.
- JSON
- Auto install
The JSON option allows you to connect a Langflow MCP server to any local or remote MCP client. You can modify this process for any MCP-compatible client.
-
Install any MCP-compatible client.
These steps use Cursor as an example, but the process is generally the same for all clients, with slight differences in client-specific details like file names.
-
In your client, add a new MCP server using the client's UI or configuration file.
For example, in Cursor, go to Cursor Settings, select MCP, and then click Add New Global MCP Server to open Cursor's global
mcp.jsonconfiguration file. -
Recommended: Configure authentication for your MCP server.
-
In Langflow, on the Projects page, click the MCP Server tab.
-
Click the JSON tab, copy the code snippet for your operating system, and then paste it into your client's MCP configuration file. For example:
{
  "mcpServers": {
    "PROJECT_NAME": {
      "command": "uvx",
      "args": [
        "mcp-proxy",
        "--transport",
        "streamablehttp",
        "http://LANGFLOW_SERVER_ADDRESS/api/v1/mcp/project/PROJECT_ID/streamable"
      ]
    }
  }
}
The MCP Server tab automatically populates the
LANGFLOW_SERVER_ADDRESSandPROJECT_IDvalues.The default Langflow server address is
http://localhost:7860. If you are using a public Langflow server, the server address is automatically included.If your Langflow server requires authentication, you must include your Langflow API key or OAuth settings in the configuration. For more information, see MCP server authentication.
-
To include other environment variables with your MCP server command, add an
envobject with key-value pairs of environment variables. For example:{
"mcpServers": {
"PROJECT_NAME": {
"command": "uvx",
"args": [
"mcp-proxy",
"--transport",
"streamablehttp",
"http://LANGFLOW_SERVER_ADDRESS/api/v1/mcp/project/PROJECT_ID/streamable"
],
"env": {
"KEY": "VALUE"
}
}
}
}Don't add API keys in the
envobject, as these variables are specifically for themcp-proxyprocess. Instead, add API keys underargs. For an example, see MCP server authentication. -
Save and close your client's MCP configuration file.
-
Confirm that your Langflow MCP server is on the client's list of MCP servers. If necessary, restart your client to apply the modified configuration file.
The auto install option is available only for specific MCP clients. Auto install requires the client to be installed locally so Langflow can write to the client's configuration file. If your client isn't supported, is installed remotely, or you need to pass additional environment variables, use the JSON option.
-
Install Cursor, Claude, or Windsurf on the same computer where your Langflow server is running.
-
Recommended: Configure authentication for your MCP server.
-
In Langflow, on the Projects page, click the MCP Server tab.
-
On the Auto install tab, find your MCP client provider, and then click Add.
Your Langflow project's MCP server is automatically added to the configuration file for your local Cursor, Claude, or Windsurf client. For example, with Cursor, the server configuration is added to the
mcp.jsonconfiguration file.Langflow attempts to add this configuration even if the selected client isn't installed. To verify the installation, check the available MCP servers in your client.
Once your MCP client is connected to your Langflow project's MCP server, your flows are registered as tools. Cursor determines when to use tools based on your queries, and requests permissions when necessary. For more information, see the MCP documentation for your client, such as Cursor's MCP documentation.
MCP server authentication
Each Langflow project has its own MCP server with its own MCP server authentication settings.
When you create a new project, Langflow automatically configures authentication for the project's MCP server based on your Langflow server's authentication settings. If authentication is enabled (AUTO_LOGIN=false), the project is automatically configured with API key authentication, and a new API key is generated for accessing the project's flows.
To configure authentication for a Langflow MCP server, go to the Projects page in Langflow, click the MCP Server tab, click Edit Auth, and then select your preferred authentication method:
- API key
- OAuth
- None
When authenticating your MCP server with a Langflow API key, your project's MCP server JSON code snippets and Auto install configuration automatically include the --headers and x-api-key arguments in the args array (for streamable transport).
Click Generate API key to automatically insert a new Langflow API key into the code template.
Alternatively, you can replace YOUR_API_KEY with an existing Langflow API key.
To add your API key to the configuration, use three separate entries in args: "--headers", "x-api-key", and your key value. For example:
{
  "mcpServers": {
    "PROJECT_NAME": {
      "command": "uvx",
      "args": [
        "mcp-proxy",
        "--transport",
        "streamablehttp",
        "--headers",
        "x-api-key",
        "YOUR_API_KEY",
        "http://LANGFLOW_SERVER_ADDRESS/api/v1/mcp/project/PROJECT_ID/streamable"
      ]
    }
  }
}
When OAuth is enabled, Langflow automatically starts an MCP Composer instance for your project, creating a secure client-side proxy between MCP clients and the mcp-proxy on your server.
OAuth integration allows your Langflow MCP server to authenticate users and applications through any OAuth 2.0 compliant service. When users or applications connect to your MCP server, they are redirected to your chosen OAuth provider to authenticate. Upon successful authentication, they are granted access to your flows as MCP tools.
Before configuring OAuth in Langflow, you must first set up an OAuth application with an external OAuth 2.0 service provider. You must register your Langflow server as an OAuth client, and then obtain the required values to complete the configuration in Langflow.
The following table describes the required values. GitHub OAuth is used for example purposes. Be sure to use the actual values from your own deployment. For more information, see your OAuth provider's documentation.
| Field | Description | Source | Example |
|---|---|---|---|
| Host | OAuth server host | MCP Composer default. | localhost |
| Port | OAuth server port | MCP Composer default. | 9000 |
| Server URL | Full OAuth server URL | Combines the MCP Composer default OAuth host and port. | http://localhost:9000 |
| Callback URL | OAuth callback URL on your server | You define this full URL during OAuth app registration. This must match exactly what you register with your OAuth provider. | http://localhost:9000/auth/idaas/callback |
| Client ID | Your OAuth client identifier | From your OAuth provider. | Ov23li9vx2grVL61qjb |
| Client Secret | Your OAuth client secret | From your OAuth provider. | 1234567890abcdef1234567890abcdef12345678 |
| Authorization URL | OAuth authorization endpoint | From your OAuth provider. | https://github.com/login/oauth/authorize |
| Token URL | OAuth token endpoint for getting refresh tokens | From your OAuth provider. | https://github.com/login/oauth/access_token |
| MCP Scope | Scope for MCP operations | You define this. As of Langflow 1.6, user is the only available value. | user |
| Provider Scope | OAuth provider scope | You define this. As of Langflow 1.6, openid is the only available value. | openid |
To configure OAuth authentication:
-
Select OAuth as the authentication type.
-
Configure the OAuth settings with the values from your OAuth deployment. All values are required.
The OAuth credentials are encrypted and stored securely in your Langflow database.
-
Click Save.
Your MCP server's JSON code snippets and Auto install configuration are automatically updated with OAuth values. These are automatically used for new installations after enabling OAuth. However, you must manually update any existing installations, as explained in the next step.
-
If you already installed your Langflow MCP server in your MCP client, you must update your MCP client configuration to use the new OAuth settings after enabling OAuth on your MCP server. The client update method depends on how you installed the server on the client:
- Auto install: Manually update your client's config file using the updated JSON snippet from the JSON tab, or repeat the steps in Auto-install to re-install the client with the updated settings.
- JSON option: Copy the updated JSON snippet from the JSON tab and replace your existing configuration.
- New connections: Use either the Auto install or JSON option. The OAuth settings are included automatically.
After you enable OAuth and update your client configuration, an OAuth callback window opens each time your MCP client attempts to authenticate with the server.
A successful authentication returns Authentication complete. You may close this window.
If your client doesn't open the OAuth window, try restarting the client to retrieve the updated configuration.
When no authentication is configured, your MCP server becomes a public endpoint that anyone can access without providing credentials. Only use this option when Langflow is running in a trusted environment.
Deploy your Langflow MCP server externally
To deploy your Langflow MCP server externally, see Deploy a public Langflow server.
Use MCP Inspector to test and debug flows
MCP Inspector requires any LTS version of Node.js installed on your computer.
MCP Inspector is a common tool for testing and debugging MCP servers. You can use MCP Inspector to monitor your flows and get insights into how they are being consumed by the MCP server.
-
Install MCP Inspector:
npx @modelcontextprotocol/inspectorFor more information about configuring MCP Inspector, including specifying a proxy port, see the MCP Inspector GitHub project.
-
Open a web browser and navigate to the MCP Inspector UI. The default address is
http://localhost:6274. -
In the MCP Inspector UI, enter the connection details for your Langflow project's MCP server. The field values depend on your server's method of authentication.
- API key
- OAuth
- None
- Transport Type: Select STDIO.
- Command:
uvx - Arguments: Enter the following list of arguments, separated by spaces. Replace the values for
YOUR_API_KEY,LANGFLOW_SERVER_ADDRESS, andPROJECT_IDwith the values from your Langflow MCP server. For example:mcp-proxy --headers x-api-key YOUR_API_KEY http://LANGFLOW_SERVER_ADDRESS/api/v1/mcp/project/PROJECT_ID/streamable
- Transport Type: Select STDIO.
- Command:
uvx - Arguments: Enter the following list of arguments, separated by spaces. Replace the value for
OAUTH_SERVER_URLwith the URL of your OAuth server. For example:mcp-composer --mode stdio --sse-url http://localhost:9000/sse --disable-composer-tools --client_auth_type oauth
- Transport Type: Select SSE.
- URL: Enter the Langflow MCP server's endpoint. For example:
http://localhost:7860/api/v1/mcp/project/d359cbd4-6fa2-4002-9d53-fa05c645319c/streamable
-
Click Connect.
If the connection was successful, you should see your project's flows in the Tools tab. From this tab, you can monitor how your flows are being registered as tools by MCP, as well as test the tools with custom input values.
-
To quit MCP Inspector, press Control+C in the same terminal window where you started it.
Restrict MCP server management to superusers
To prevent non-superusers from editing MCP server connections, set LANGFLOW_MCP_SERVERS_LOCKED=true.
When set to true, non-superusers can use existing MCP servers that are already configured, but they cannot configure MCP server connections in the UI or API.
Superusers retain full access to MCP server configuration.
Locking the MCP server configuration for users does not disable Langflow's built-in MCP server for serving flows as MCP tools.
MCP server environment variables
The following environment variables set behaviors related to your Langflow projects' MCP servers:
| Variable | Format | Default | Description |
|---|---|---|---|
LANGFLOW_MCP_SERVER_ENABLED | Boolean | True | Whether to initialize an MCP server for each of your Langflow projects. If false, Langflow doesn't initialize MCP servers. |
LANGFLOW_MCP_SERVER_ENABLE_PROGRESS_NOTIFICATIONS | Boolean | False | If true, Langflow MCP servers send progress notifications. |
LANGFLOW_MCP_SERVER_TIMEOUT | Integer | 20 | Timeout in seconds for MCP connection setup and tool execution. See Configure tool execution timeouts. |
LANGFLOW_MCP_TOOL_EXECUTION_TIMEOUT | Integer | 180 | Global timeout in seconds for MCP tool calls. See Configure tool execution timeouts. |
LANGFLOW_MCP_MAX_SESSIONS_PER_SERVER | Integer | 10 | Maximum number of MCP sessions to keep per unique server. |
LANGFLOW_ADD_PROJECTS_TO_MCP_SERVERS | Boolean | True | Whether to automatically add newly created projects to the user's MCP servers configuration. If false, projects must be manually added to MCP servers. |
LANGFLOW_MCP_SERVERS_LOCKED | Boolean | False | If true, non-superusers cannot add, edit, or remove MCP server connections through the UI or API. Superusers retain full access. For more information, see Restrict MCP server management to superusers. |
Troubleshoot Langflow MCP servers
For troubleshooting advice for MCP servers and clients, see Troubleshoot Langflow: MCP issues.
See also
Was this page helpful?