Use Langflow agents
Langflow's Agent component is critical for building agent flows. This component provides everything you need to create an agent, including multiple Large Language Model (LLM) providers, tool calling, and custom instructions. It simplifies agent configuration so you can focus on application development.
How do agents work?
Agents extend Large Language Models (LLMs) by integrating tools, which are functions that provide additional context and enable autonomous task execution. These integrations make agents more specialized and powerful than standalone LLMs.
Whereas an LLM might generate acceptable, inert responses to general queries and tasks, an agent can leverage the integrated context and tools to provide more relevant responses and even take action. For example, you might create an agent that can access your company's documentation, repositories, and other resources to help your team with tasks that require knowledge of your specific products, customers, and code.
Agents use LLMs as a reasoning engine to process input, determine which actions to take to address the query, and then generate a response. The response could be a typical text-based LLM response, or it could involve an action, like editing a file, running a script, or calling an external API.
In an agentic context, tools are functions that the agent can run to perform tasks or access external resources.
A function is wrapped as a Tool object with a common interface that the agent understands.
Agents become aware of tools through tool registration, which is when the agent is provided a list of available tools typically at agent initialization.
The Tool object's description tells the agent what the tool can do so that it can decide whether the tool is appropriate for a given request.
Use the Agent component in a flow
The following steps explain how to create an agent flow in Langflow from a blank flow. For a prebuilt example, use the Simple Agent template or the Langflow quickstart.
-
Click New Flow, and then click Blank Flow.
-
Add an Agent component to your flow.
-
To edit Langflow's global model provider configuration, do the following:
-
To open the Model Providers pane, click your profile icon, select Settings, and then click Model Providers.
-
In the Model Providers pane, select a provider.
-
In the API Key field, add your provider's API key. Some providers require additional configuration fields. For more information, see the model provider's documentation.
The key must have permission to call the models you want to use in your flow, and your account must have sufficient credits for the actions you want to perform.
You can only add one key for each provider. Make sure the key has access to all models that you want to use in Langflow.
-
Click Save.
-
Enable the specific models that you want to use in Langflow. The available models depend on the provider and your API key's permissions. Models that generate text are listed under Language Models. Models that generate embeddings are listed under Embedding Models.
After you enable a model in Langflow's global model configuration, you can use that model in any model-driven component in your flows.
-
-
Select the model that you want to use from the Language Model dropdown. If your preferred model isn't listed, make sure it's enabled in the Models configuration. For more information, see Agent component parameters.
-
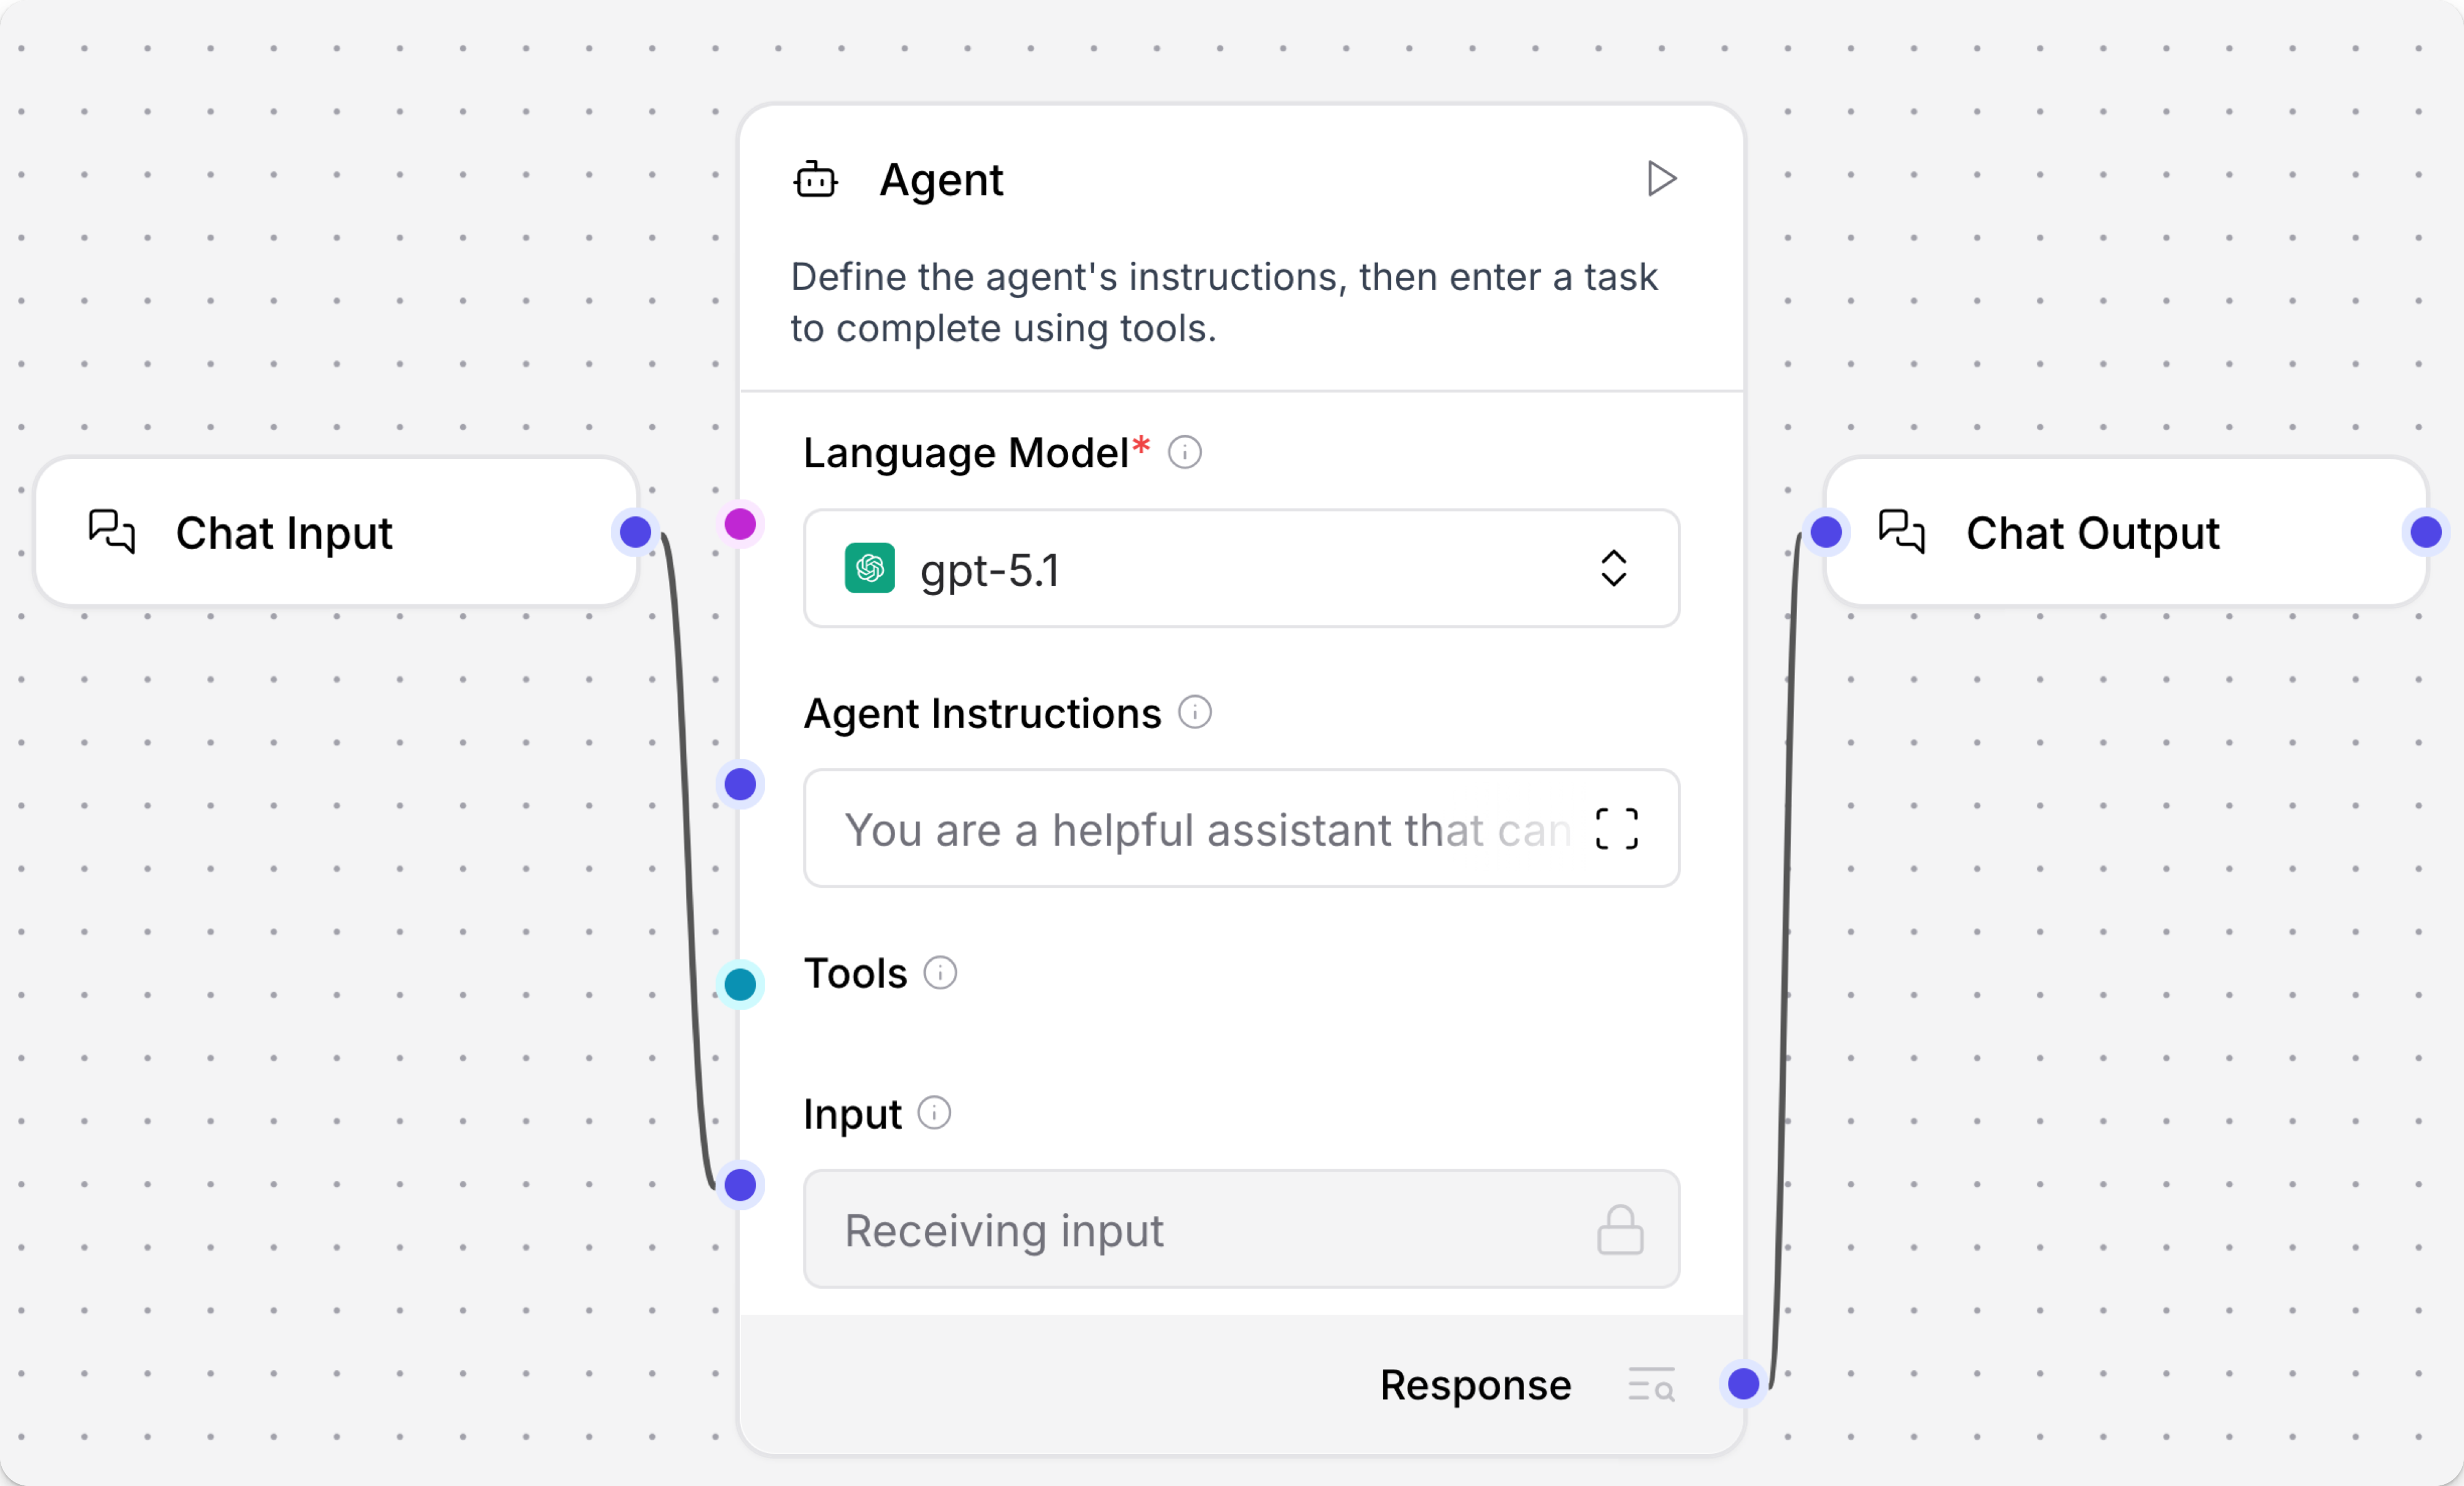
Add Chat Input and Chat Output components to your flow, and then connect them to the Agent component.
At this point, you have created a basic LLM-based chat flow that you can test in the Playground. However, this flow only chats with the LLM. To enhance this flow and make it truly agentic, add some tools, as explained in the next steps.
-
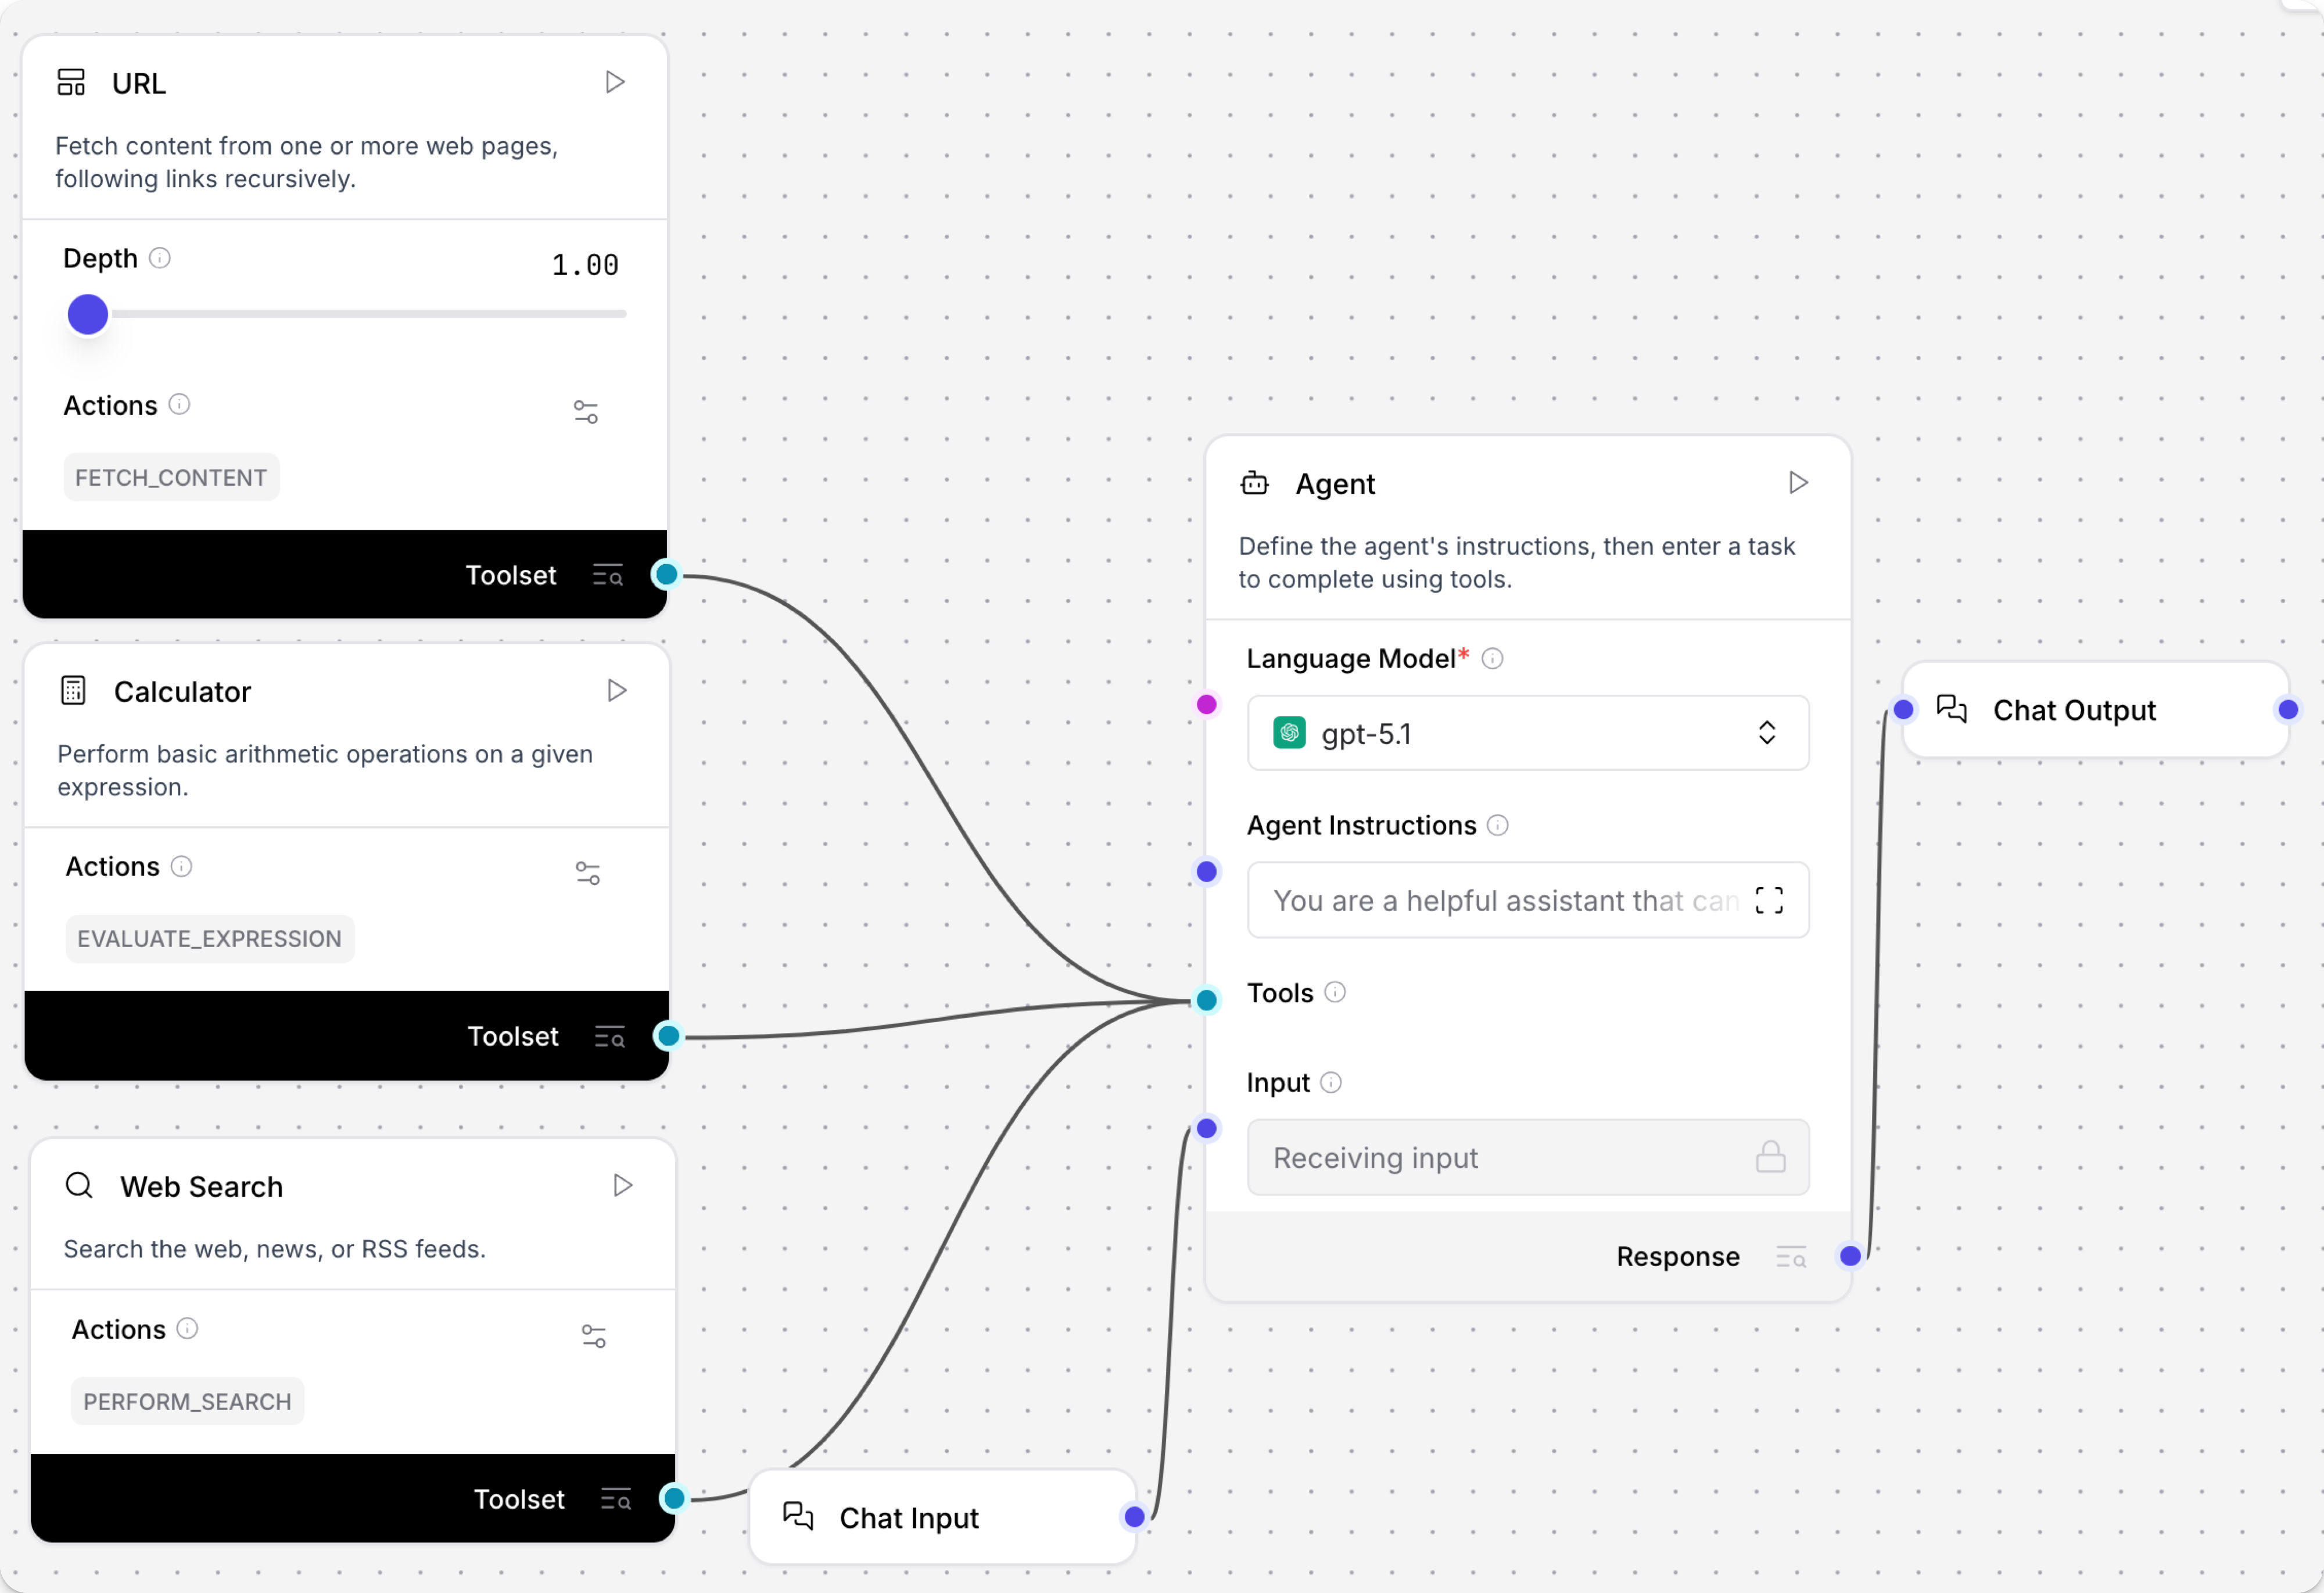
Add Web Search, URL, and Calculator components to your flow.
-
Enable Tool Mode in the Web Search, URL, and Calculator components:
- Click the Web Search component to expose the component's header menu, and then enable Tool Mode.
- Repeat for the URL and Calculator components.
- Connect the Toolset port for each tool component to the Tools port on the Agent component.
Tool Mode makes a component into a tool by modifying the component's inputs. With Tool Mode enabled, a component can accept requests from an Agent component to use the component's available actions as tools.
When in Tool Mode, a component has a Toolset port that you must connect to an Agent component's Tools port if you want to allow the agent to use that component's actions as tools.
For more information, see Configure tools for agents.
-
Open the Playground, and then ask the agent,
What tools are you using to answer my questions?The agent should respond with a list of the connected tools. It may also include built-in tools.
_10I use a combination of my built-in knowledge (up to June 2024) and a set of external tools to answer your questions. Here are the main types of tools I can use:_10Web Search & Content Fetching: I can fetch and summarize content from web pages, including crawling links recursively._10News Search: I can search for recent news articles using Google News via RSS feeds._10Calculator: I can perform arithmetic calculations and evaluate mathematical expressions._10Date & Time: I can provide the current date and time in various time zones._10These tools help me provide up-to-date information, perform calculations, and retrieve specific data from the internet when needed. If you have a specific question, let me know, and I'll use the most appropriate tool(s) to help! -
To test a specific tool, ask the agent a question that uses one of the tools, such as
Summarize today's tech news.To help you debug and test your flows, the Playground displays the agent's tool calls, the provided input, and the raw output the agent received before generating the summary. With the given example, the agent should call the Web Search component with Search Mode set to News.
You've successfully created a basic agent flow that uses some generic tools.
To continue building on this tutorial, try connecting other tool components or use Langflow as an MCP client to support more complex and specialized tasks.
For a multi-agent example, see Use an agent as a tool.
Agent component parameters
You can configure the Agent component to use your preferred provider and model, custom instructions, and tools.
Some parameters are hidden by default in the visual editor. You can modify all component parameters through the component inspection panel that appears when you select a component.
Provider and model
Use the Language Model (agent_llm) setting to select the LLM that you want the agent to use.
To edit Langflow's global model provider configuration, do the following:
-
To open the Model Providers pane, click your profile icon, select Settings, and then click Model Providers.
-
In the Model Providers pane, select a provider.
-
In the API Key field, add your provider's API key. Some providers require additional configuration fields. For more information, see the model provider's documentation.
The key must have permission to call the models you want to use in your flow, and your account must have sufficient credits for the actions you want to perform.
You can only add one key for each provider. Make sure the key has access to all models that you want to use in Langflow.
-
Click Save.
-
Enable the specific models that you want to use in Langflow. The available models depend on the provider and your API key's permissions. Models that generate text are listed under Language Models. Models that generate embeddings are listed under Embedding Models.
After you enable a model in Langflow's global model configuration, you can use that model in any model-driven component in your flows.
To use a model with the Agent component, select the model in the Agent component's Language Model field.
The Language Model field lists all language models that you've configured globally. If a provider doesn't have any language models available, they aren't listed. For example, if a provider offers only embeddings models, those models aren't listed on the Agent component.
To access other providers or models, you can do either of the following:
- Connect any language model component to the Agent component's Language Model port. This option allows you to connect a custom language model component to use models that aren't available in the global model providers list.
- Configure additional providers in the Models pane, and then select the model from the Language Model dropdown.
If you need to generate embeddings in your flow, use an embedding model component.
Agent instructions and input
In the Agent Instructions (system_prompt) field, you can provide custom instructions that you want the Agent component to use for every conversation.
These instructions are applied in addition to the Input (input_value), which can be entered directly or provided through another component, such as a Chat Input component.
Tools
Agents are most useful when they have the appropriate tools available to complete requests.
An Agent component can use any Langflow component as a tool, including other agents and MCP servers.
To attach a component as a tool, you must enable Tool Mode on the component that you want to attach, and then attach it to the Agent component's Tools port. For more information, see Configure tools for agents.
To allow agents to use tools from MCP servers, use the MCP Tools component.
Agent memory
Langflow agents have built-in chat memory that is enabled by default. This memory allows them to retrieve and reference messages from previous conversations, maintaining a rolling context window for each chat session ID.
Chat memories are grouped by session ID (session_id).
It is recommended to use custom session IDs if you need to segregate chat memory for different users or applications that run the same flow.
By default, the Agent component uses your Langflow installation's storage, and it retrieves a limited number of chat messages, which you can configure with the Number of Chat History Messages parameter.
The Message History component isn't required for default chat memory, but it is required if you want to use external chat memory like Mem0. Additionally, the Message History component provides more options for sorting, filtering, and limiting memories. Although, most of these options are built-in to the Agent component with default values.
Langflow sends events to the Playground during each agent run: the input message, each tool call with its input and result, streaming tokens as they arrive, and the final answer. Langflow writes the completed message to chat history when the run finishes. When using the Structured Response output, Langflow does not send events to the Playground and does not write to chat history.
For more information, see Store chat memory and Message History component.
Additional parameters
With the Agent component, the available parameters can change depending on the selected provider and model, including support for additional modes, arguments, or features like chat memory and temperature. For example:
- Current Date (
add_current_date_tool): When enabled (true), this setting adds a tool to the agent that can retrieve the current date. - Handle Parse Errors (
handle_parsing_errors): When enabled (true), this setting allows the agent to fix errors, like typos, when analyzing user input. - Verbose (
verbose): When enabled (true), this setting records detailed logging output for debugging and analysis.
Some parameters are hidden by default in the visual editor. You can modify all component parameters through the component inspection panel that appears when you select a component.
Agent component output
The Agent component has two outputs:
-
Response (
response): The agent's reply asMessagedata, which is typically connected to a Chat Output component. -
Structured Response (
structured_response): The agent's reply formatted as structuredDataaccording to the Output Schema you define.To configure the agent's Structured Response output:
- In the Agent component, click the output label near the component's output port and select Structured Response.
- Select the Agent component to open the component inspection panel, and then click Open table.
- Click + to add a row for each field you want to extract. For each row, enter a Name, Type, and optionally a Description and As List toggle.
- Connect the Structured Response port to a downstream component that accepts
Datainput, such as a Parser or JSON Operations component.
The Agent component uses the connected LLM to extract structured data, and the extraction behavior is configured in the Output Format Instructions field. Modify the prompt in the Output Format Instructions field to change extraction behavior. This does not modify the schema defined in Output Schema.
Both outputs can be connected at the same time, but each output produces a separate LLM call. If you only need structured data, connect Structured Response only.