Chat Widget
The Langflow Chat Widget is a powerful web component that enables communication with a Langflow project. This widget allows for a chat interface embedding, allowing the integration of Langflow into web applications effortlessly.
Features
🌟 Seamless Integration: Easily integrate the Langflow Chat Widget into your website or web application with just a few lines of JavaScript.
🚀 Interactive Chat Interface: Engage your users with a user-friendly conversation, powered by Langflow's advanced language understanding capabilities.
🎛️ Customizable Styling: Customize the appearance of the chat widget to match your application's design and branding.
🌐 Multilingual Support: Communicate with users in multiple languages, opening up your application to a global audience.
Usage
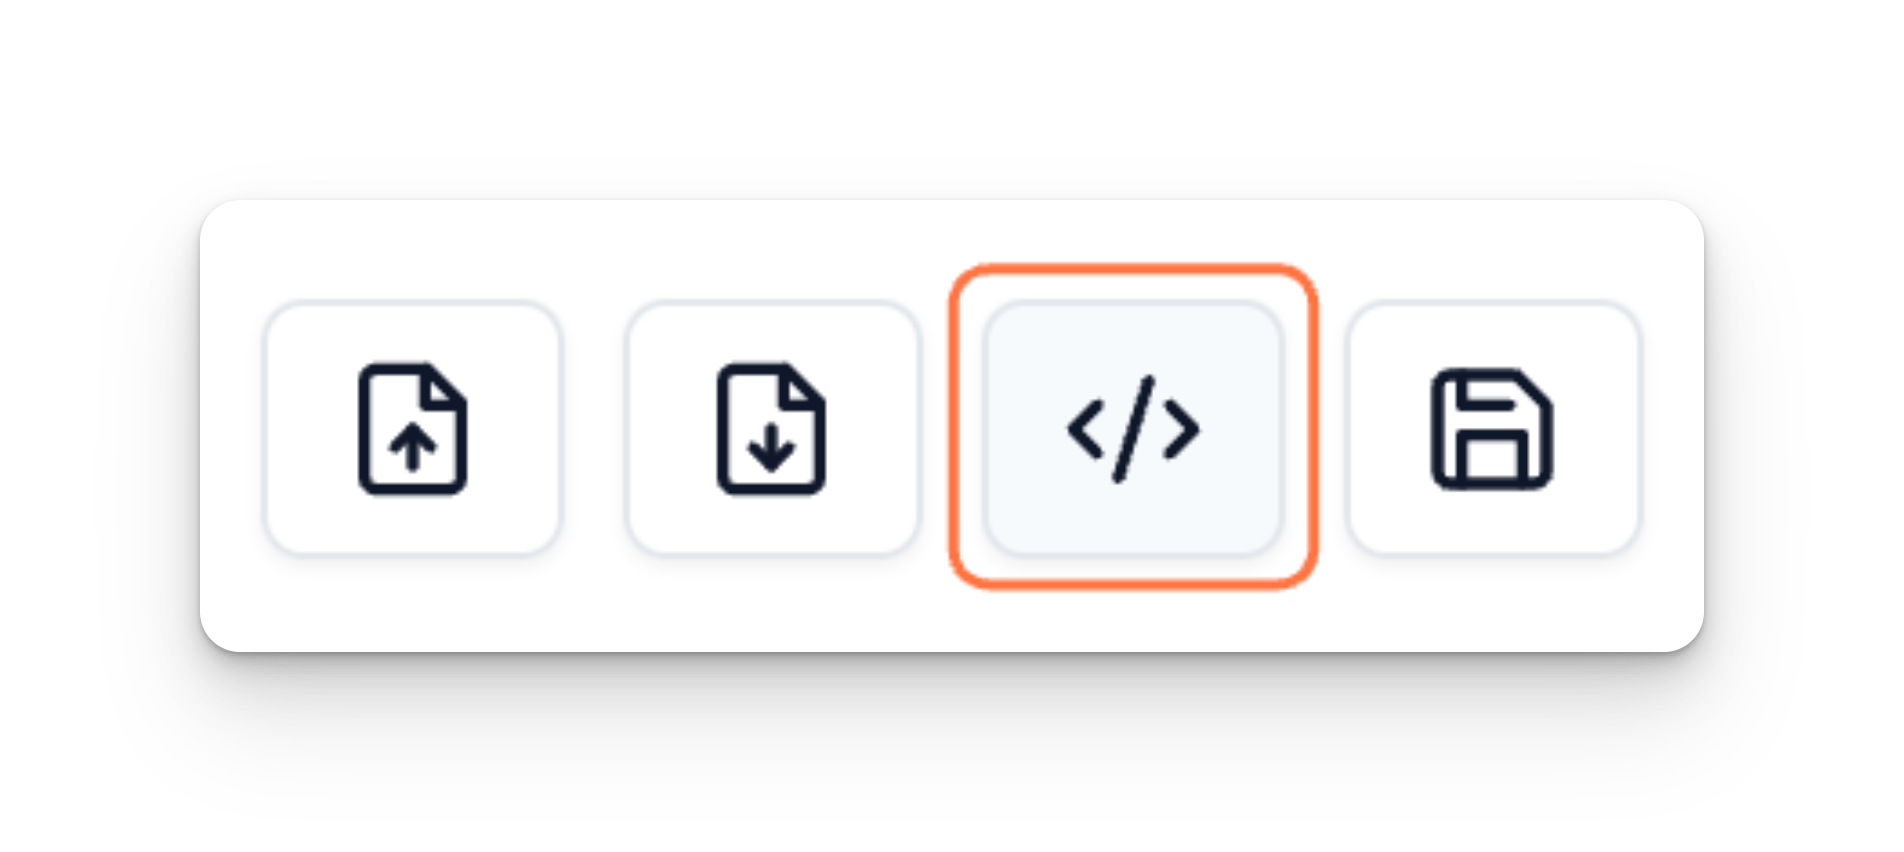
You can get the HTML code embedded with the chat by clicking the Code button at the Sidebar after building a flow.
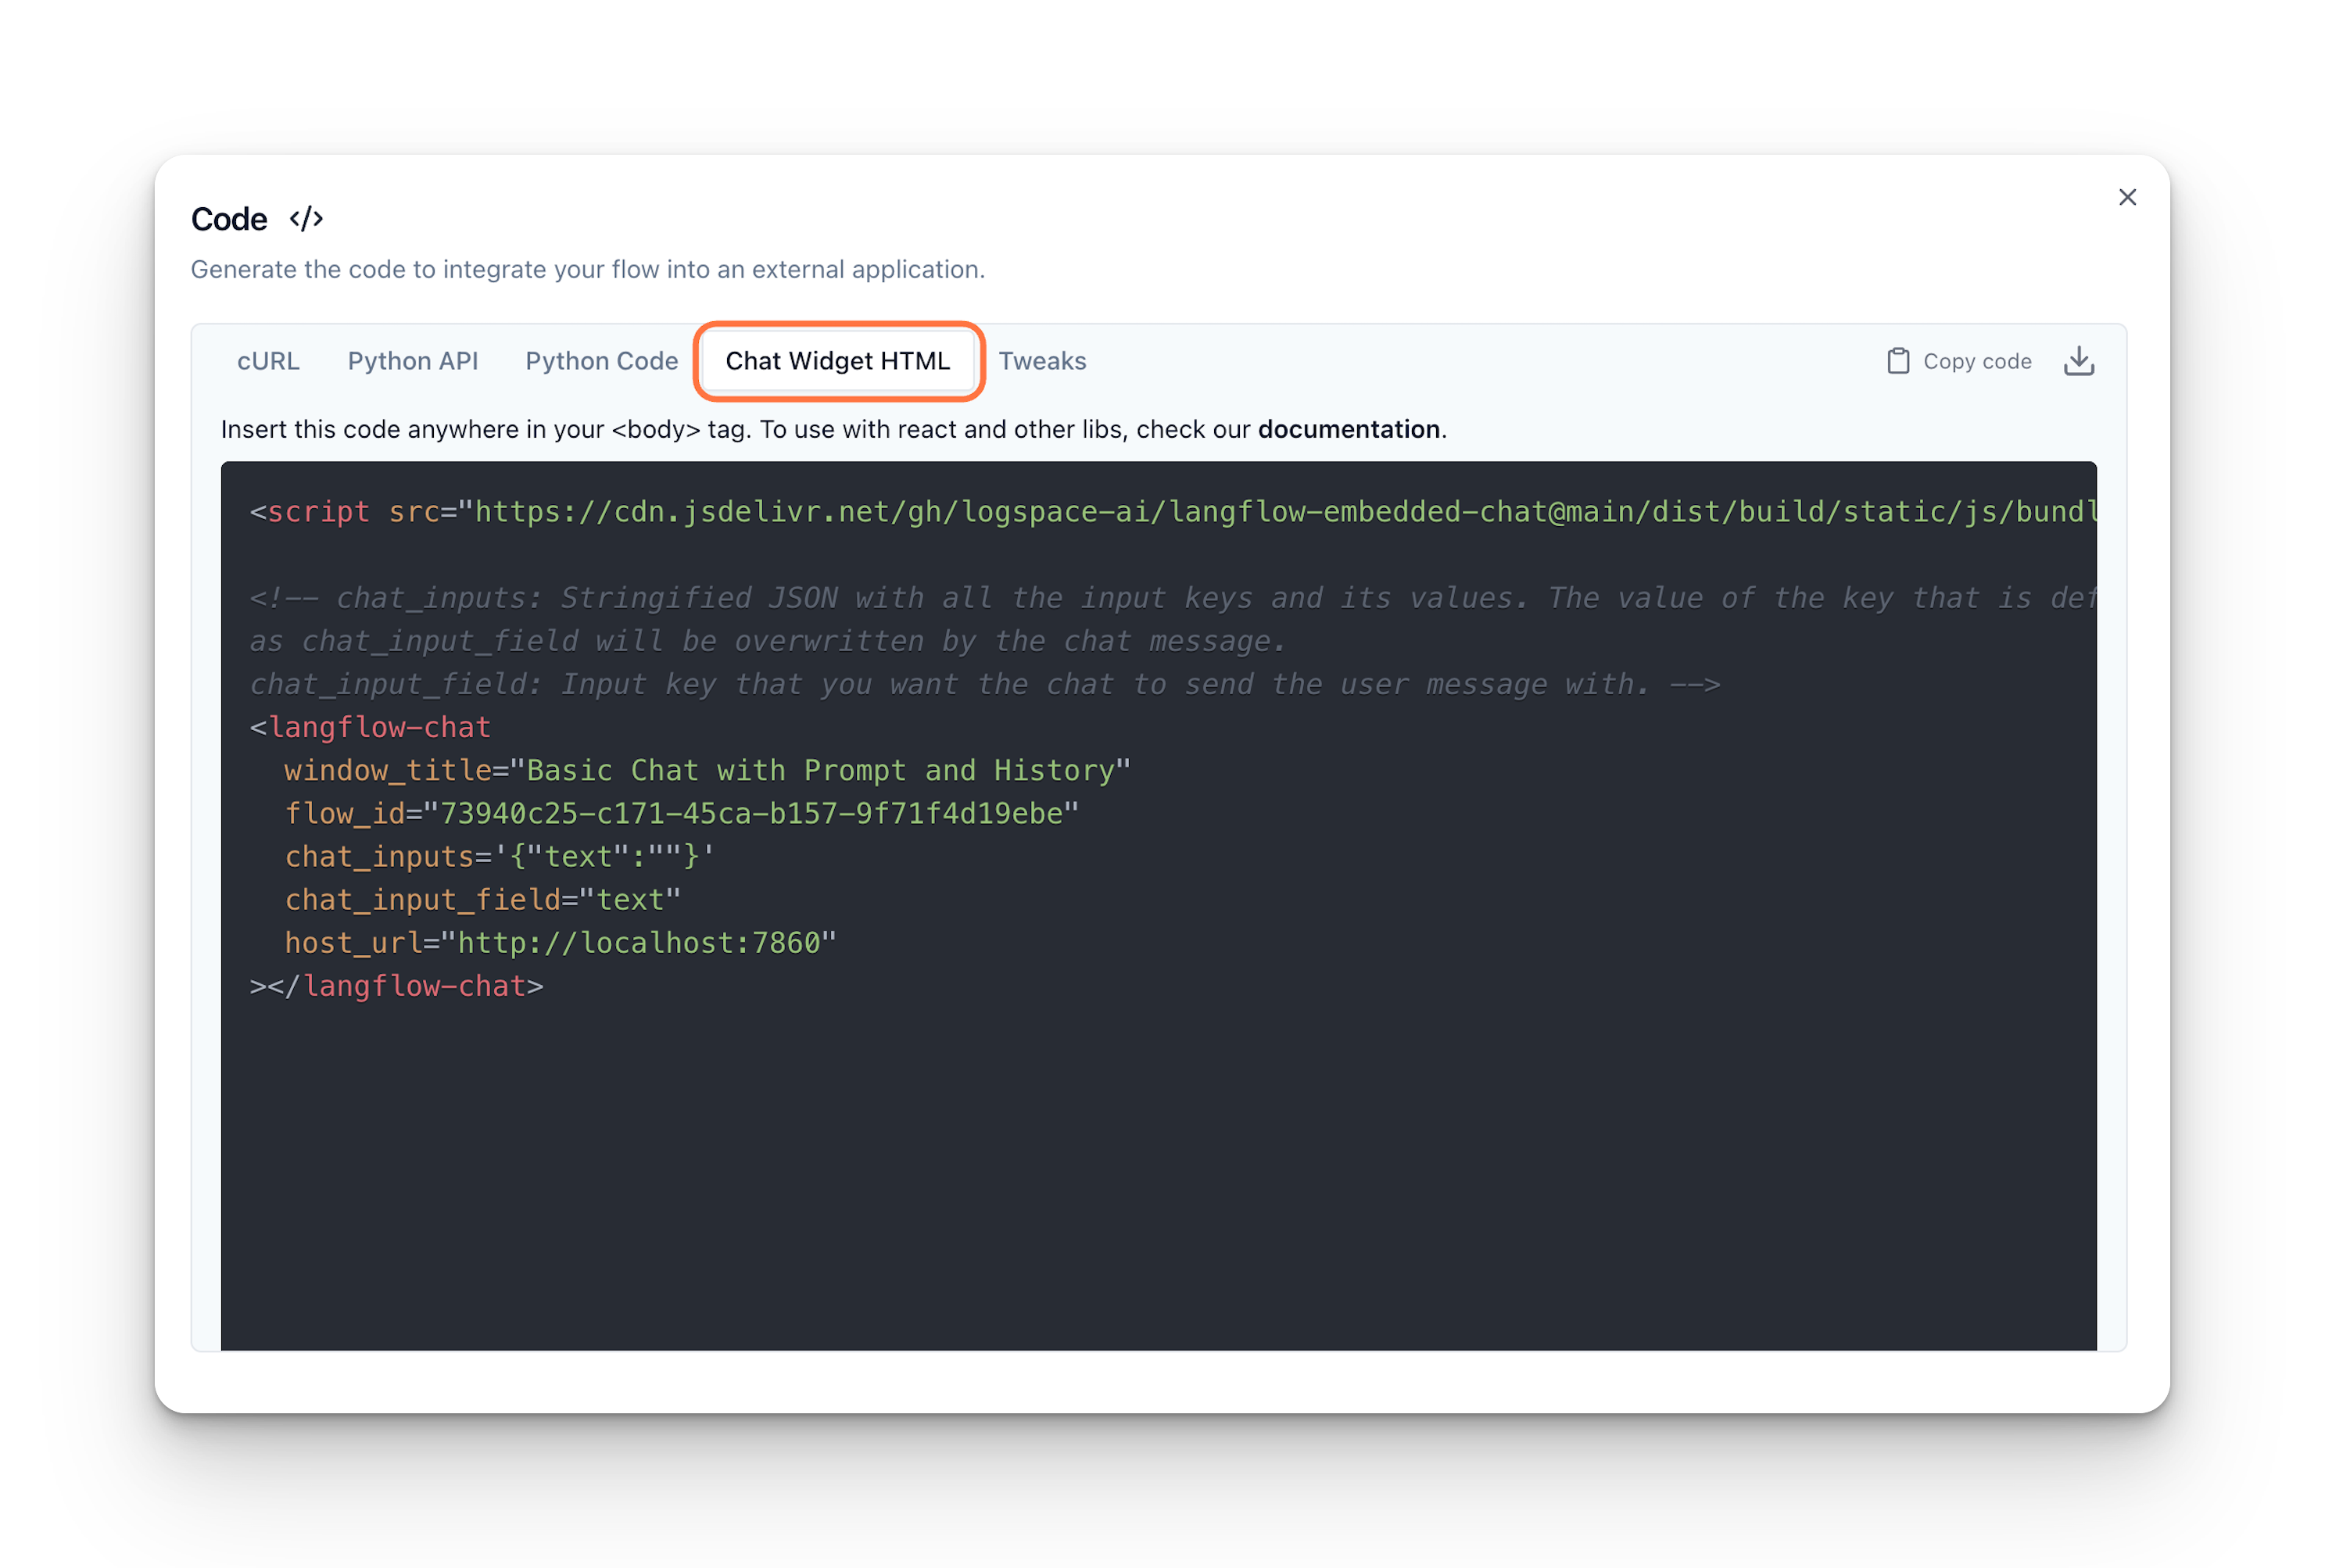
Clicking the Chat Widget HTML tab, you'll get the code to be inserted. Read below to learn how to use it with HTML, React and Angular.
HTML
The Chat Widget can be embedded into any HTML page, inside a <body> tag, as demonstrated in the video below.
React
To embed the Chat Widget using React, you'll need to insert this <script> tag into the React index.html file, inside the <body> tag:
_10<script src="https://cdn.jsdelivr.net/gh/logspace-ai/langflow-embedded-chat@main/dist/build/static/js/bundle.min.js"></script>
Then, declare your Web Component and encapsulate it in a React component.
_20declare global {_20 namespace JSX {_20 interface IntrinsicElements {_20 "langflow-chat": any;_20 }_20 }_20}_20_20export default function ChatWidget({ className }) {_20 return (_20 <div className={className}>_20 <langflow-chat_20 chat_inputs='{"your_key":"value"}'_20 chat_input_field="your_chat_key"_20 flow_id="your_flow_id"_20 host_url="langflow_url"_20 ></langflow-chat>_20 </div>_20 );_20}
Finally, you can place the component anywhere in your code to display the Chat Widget.
Angular
To use it in Angular, first add this <script> tag into the Angular index.html file, inside the <body> tag.
_10<script src="https://cdn.jsdelivr.net/gh/logspace-ai/langflow-embedded-chat@main/dist/build/static/js/bundle.min.js"></script>
When you use a custom web component in an Angular template, the Angular compiler might show a warning when it doesn't recognize the custom elements by default. To suppress this warning, add CUSTOM_ELEMENTS_SCHEMA to the module's @NgModule.schemas.
- Open the module file (it typically ends with .module.ts) where you'd add the
langflow-chatweb component. - Import
CUSTOM_ELEMENTS_SCHEMAat the top of the file:
_10import { NgModule, CUSTOM_ELEMENTS_SCHEMA } from "@angular/core";
- Add
CUSTOM_ELEMENTS_SCHEMAto the 'schemas' array inside the '@NgModule' decorator:
_10@NgModule({_10 declarations: [_10 // ... Other components and directives ..._10 ],_10 imports: [_10 // ... Other imported modules ..._10 ],_10 schemas: [CUSTOM_ELEMENTS_SCHEMA], // Add the CUSTOM_ELEMENTS_SCHEMA here_10})_10export class YourModule {}
In your Angular project, find the component belonging to the module where CUSTOM_ELEMENTS_SCHEMA was added.
- Inside the template, add the
langflow-chattag to include the Chat Widget in your component's view:
_10<langflow-chat_10 chat_inputs='{"your_key":"value"}'_10 chat_input_field="your_chat_key"_10 flow_id="your_flow_id"_10 host_url="langflow_url"_10></langflow-chat>
CUSTOM_ELEMENTS_SCHEMAis a built-in schema that allows Angular to recognize custom elements.Adding
CUSTOM_ELEMENTS_SCHEMAtells Angular to allow custom elements in your templates, and it will suppress the warning related to unknown elements likelangflow-chat.Notice that you can only use the Chat Widget in components that are part of the module where you added
CUSTOM_ELEMENTS_SCHEMA.
Configuration
Use the widget API to customize your Chat Widget:
Props with the type JSON need to be passed as Stringified JSONs, with the format {"key":"value"}.
| Prop | Type | Required | Description |
|---|---|---|---|
| bot_message_style | JSON | No | Applies custom formatting to bot messages. |
| chat_input_field | String | Yes | Defines the type of the input field for chat messages. |
| chat_inputs | JSON | Yes | Determines the chat input elements and their respective values. |
| chat_output_key | String | No | Specifies which output to display if multiple outputs are available. |
| chat_position | String | No | Positions the chat window on the screen (options include: top-left, top-center, top-right, center-left, center-right, bottom-right, bottom-center, bottom-left). |
| chat_trigger_style | JSON | No | Styles the chat trigger button. |
| chat_window_style | JSON | No | Customizes the overall appearance of the chat window. |
| error_message_style | JSON | No | Sets the format for error messages within the chat window. |
| flow_id | String | Yes | Identifies the flow that the component is associated with. |
| height | Number | No | Sets the height of the chat window in pixels. |
| host_url | String | Yes | Specifies the URL of the host for chat component communication. |
| input_container_style | JSON | No | Applies styling to the container where chat messages are entered. |
| input_style | JSON | No | Sets the style for the chat input field. |
| online | Boolean | No | Toggles the online status of the chat component. |
| online_message | String | No | Sets a custom message to display when the chat component is online. |
| placeholder | String | No | Sets the placeholder text for the chat input field. |
| placeholder_sending | String | No | Sets the placeholder text to display while a message is being sent. |
| send_button_style | JSON | No | Sets the style for the send button in the chat window. |
| send_icon_style | JSON | No | Sets the style for the send icon in the chat window. |
| tweaks | JSON | No | Applies additional custom adjustments for the associated flow. |
| user_message_style | JSON | No | Determines the formatting for user messages in the chat window. |
| width | Number | No | Sets the width of the chat window in pixels. |
| window_title | String | No | Sets the title displayed in the chat window's header or title bar. |