Connect to MCP servers from your application
This tutorial shows you how to connect MCP servers to your applications using Langflow's MCP Tools component.
The Model Context Protocol (MCP) helps agents integrate with LLMs through MCP clients and MCP servers. Specifically, MCP servers host tools that agents (MCP clients) use to complete specialized tasks. MCP servers are connected to MCP clients like Cursor. Then, you interact with the client, and the client uses tools from the connected servers as needed to complete your requests.
You can run Langflow as an MCP client and an MCP server:
-
Use Langflow as an MCP client: When run as an MCP client, an Agent component in a Langflow flow can use connected components as tools to handle requests. You can use existing components as tools, and you can connect any MCP server to your flow to make that server's tools available to the agent.
-
Use Langflow as an MCP server: When run as an MCP server, your flows become tools that can be used by an MCP client, which could be an external client or another Langflow flow.
In this tutorial, you will use the Langflow MCP Tools component to connect multiple MCP servers to your flow, and then you'll use a Python application to run your flow and chat with the agent programmatically.
Prerequisites
- Install and start Langflow
- Create a Langflow API key
- Create an OpenAI API key
This tutorial uses an OpenAI LLM. If you want to use a different provider, you need a valid credential for that provider.
Create an agent flow
-
In Langflow, click New Flow, and then select the Simple Agent template.
-
In the Agent component, enter your OpenAI API key.
If you want to use a different provider or model, edit the Model Provider, Model Name, and API Key fields accordingly.
-
To test the flow, click Playground, and then ask the LLM
Is it safe to go hiking in the Adirondacks today?This query demonstrates how an LLM, by itself, might not have access to information or functions designed to address specialized queries. In this example, the default OpenAI model provides a vague response, although the agent does know the current date by using its internal
get_current_datefunction.Today is July 11, 2025.
To determine if it's safe to go hiking in the Adirondacks today, you should check the current weather conditions, trail advisories, and any local alerts (such as bear activity or flooding).
Would you like a detailed weather forecast or information on trail conditions for the Adirondacks today?To improve the response, you can connect MCP servers to your flow that provide specialized tools for the agent to use when generating responses. In the next part of this tutorial, you'll connect an MCP server that provides the agent with real-time weather information so that it can generate a more specific response.
Add an MCP Tools component
There are many MCP servers available online that offer different tools for different tasks. To use an MCP server with an MCP client, you have to make the server available to the client. With all MCP clients, there are several ways to do this:
- Install the server locally.
- Use
uvxornpxto fetch and run a server package. - Call a server running remotely, like those available on Smithery.
This tutorial demonstrates how to install a weather server locally with uv pip install, and how to use npx to run the geolocation server package.
Your particular MCP server's requirements may vary.
In Langflow, you use the MCP Tools component to connect a specific MCP server to a flow. You need one MCP Tools component for each MCP server that you want your flow to use.
-
For this tutorial, install a weather MCP server on your local machine with uv and Python:
uv pip install mcp_weather_serverMake sure you install the server in the same Python environment where Langflow is running:
- Langflow in a virtual environment: Activate the environment before installing the server.
- Langflow Docker image: Install the server inside the Docker container.
- Langflow Desktop or system-wide Langflow OSS: Install the server globally or in the same user environment where you run Langflow.
-
In your Simple Agent flow, remove the URL and Calculator tools.
-
Open the MCP section in the left sidebar, click Add MCP Server, and register the weather MCP server.
-
In the Add MCP Server pane, provide the server startup command and arguments to connect the weather MCP server to your flow. For this tutorial, use either the JSON or STDIO option.
Langflow runs the command to launch the server when the agent determines that it needs to use a tool provided by that server.
Notice that both configurations provide the same information but in different formats. This means that if your MCP server repository only provides a JSON file for the server, you can still use those values with the STDIO option.
- JSON
- STDIO
To provide the MCP server configuration as a JSON object, select JSON, and then paste the server configuration into the JSON field:
{
  "mcpServers": {
    "weather": {
      "command": "python",
      "args": [
        "-m",
        "mcp_weather_server"
      ],
      "disabled": false,
      "autoApprove": []
    }
  }
}
To provide the MCP server configuration in a GUI format, select STDIO, and then enter the MCP server configuration values into the given fields:
- Name:
weather - Command:
python - Arguments:
-mmcp_weather_server
-
Click Add Server, and then wait for the Actions list to populate. This means that the MCP server successfully connected.
-
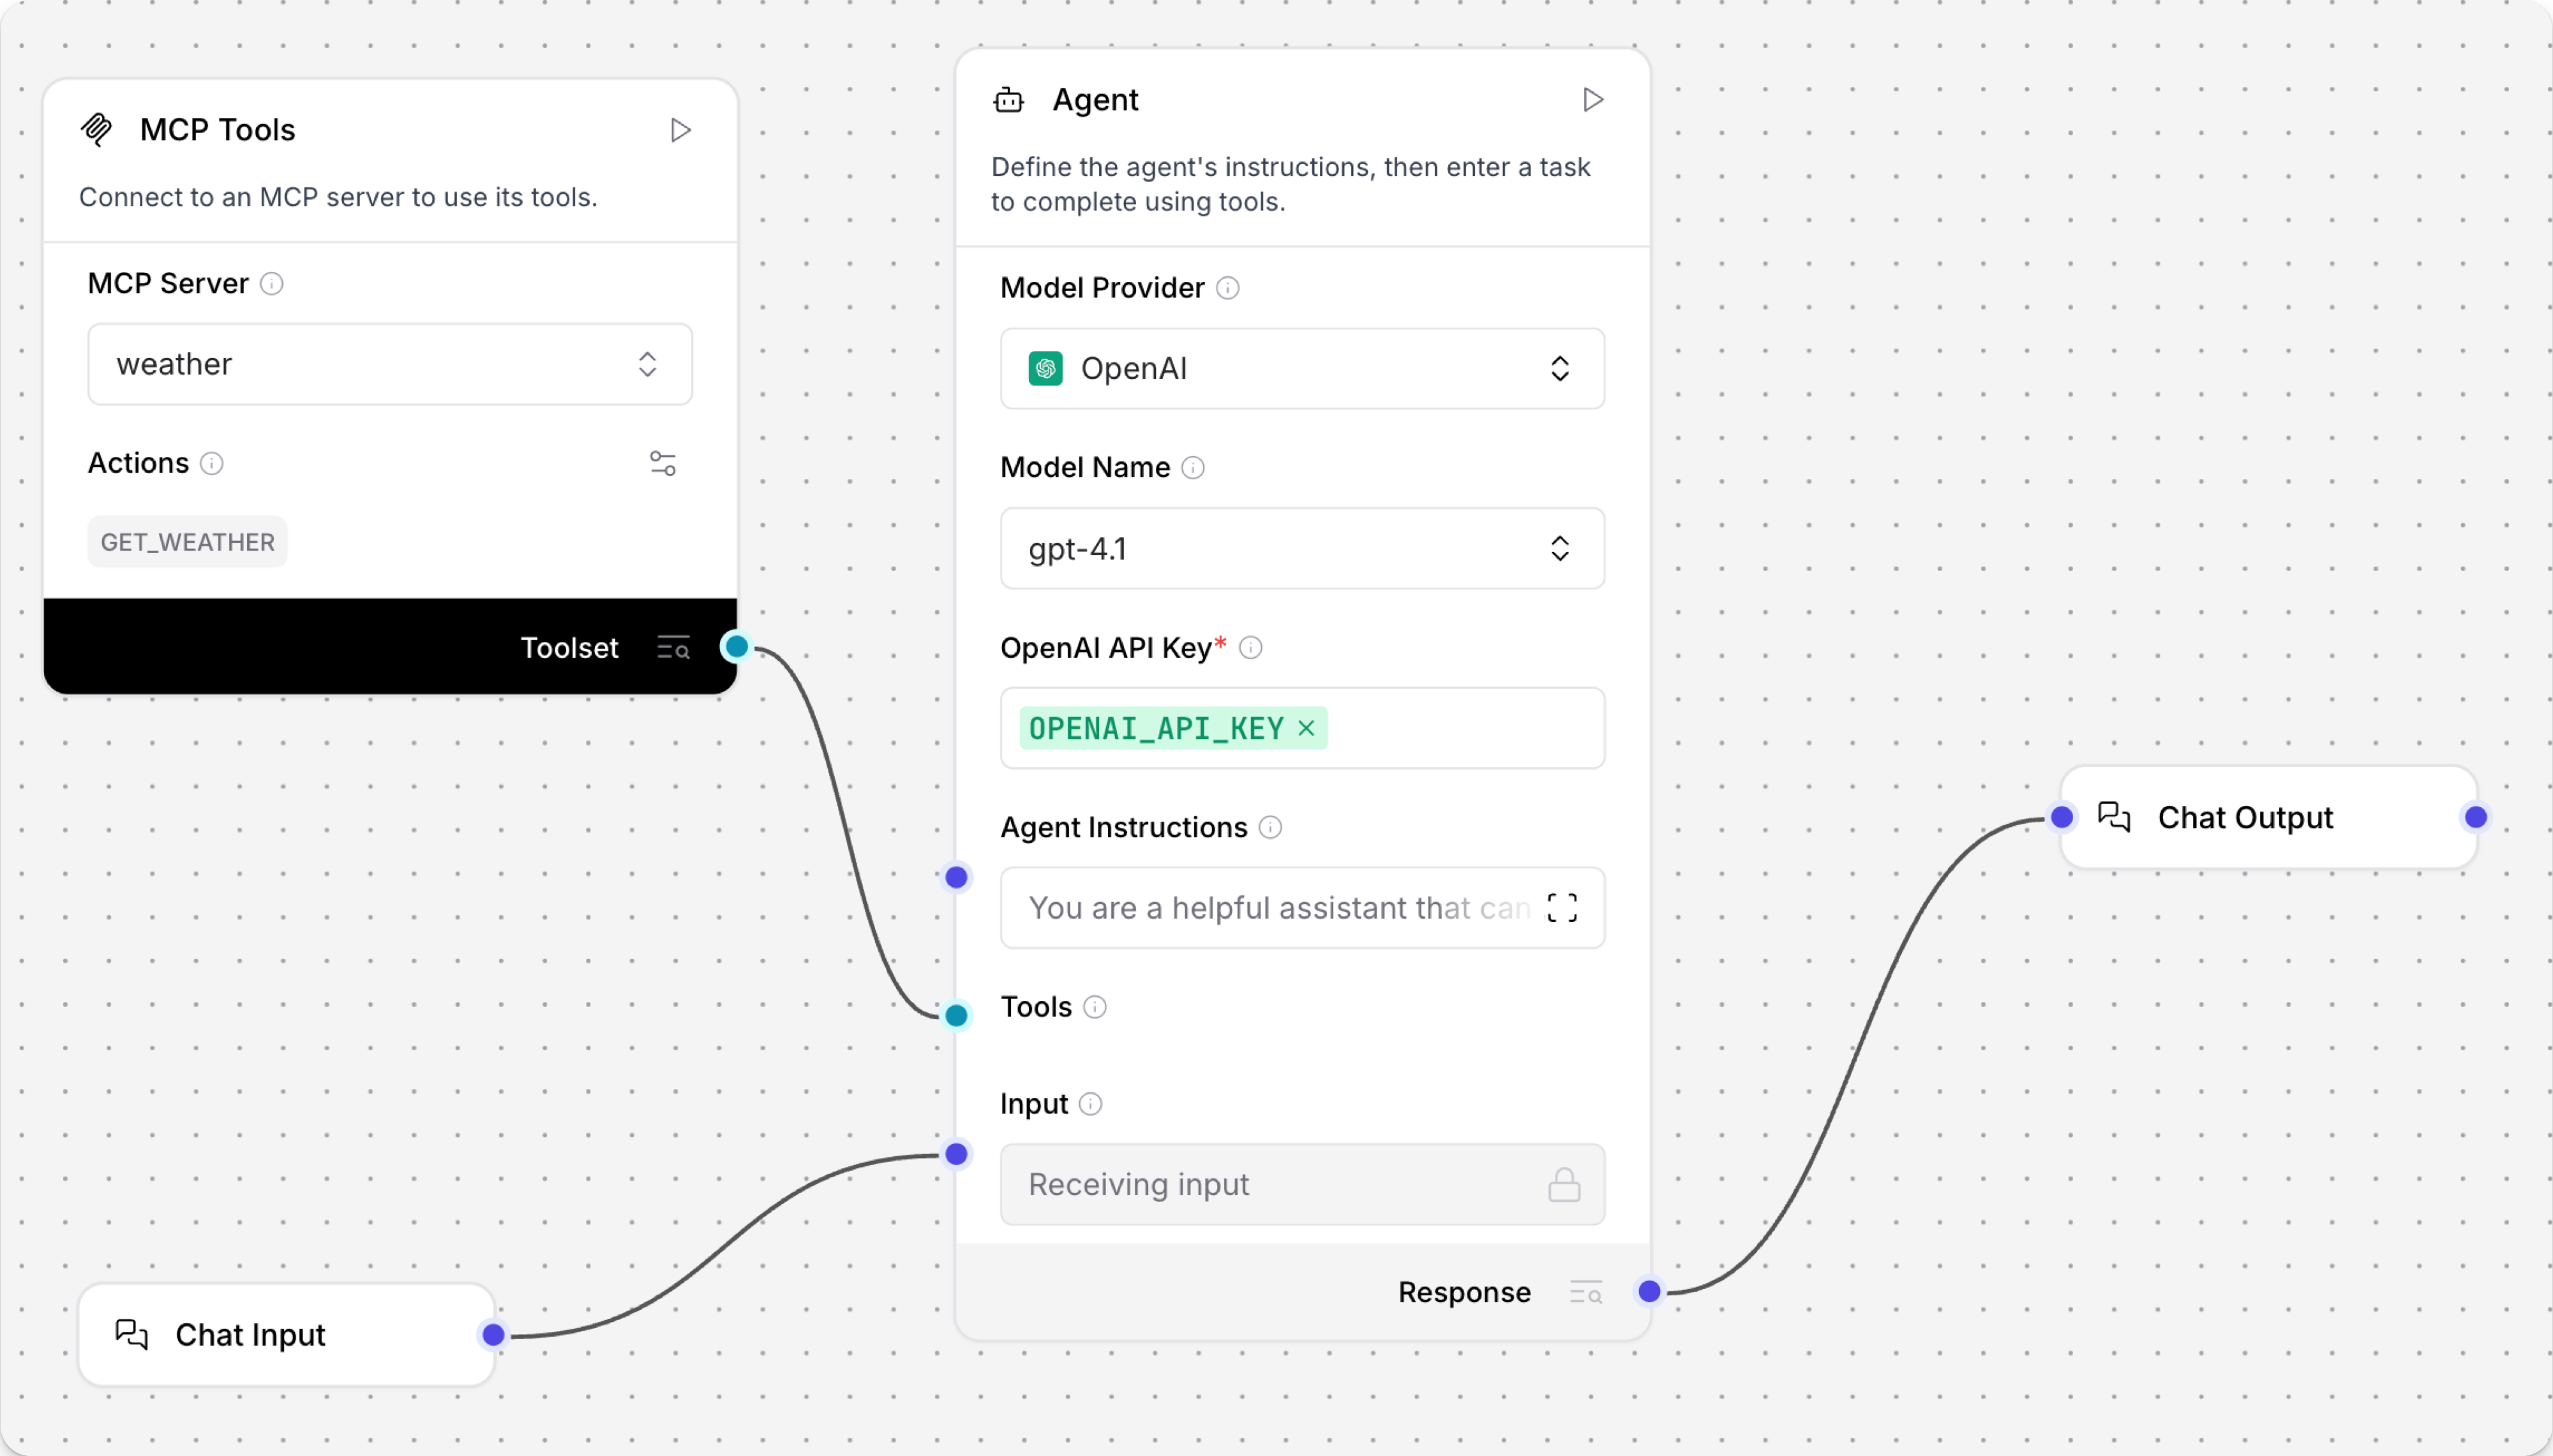
Drag the weather MCP server from the MCP sidebar onto the canvas to add the MCP Tools component for that server.
With this weather server, the MCP Tools component also adds an optional City field. For this tutorial, don't enter anything in this field. Instead, you will add a geolocation MCP server in the next step, which the agent will use to detect your location.
-
Click the MCP Tools component, enable Tool Mode in the component's header menu, and then connect the component's Toolset port to the Agent component's Tools port.
At this point your flow has four connected components:
- The Chat Input component is connected to the Agent component's Input port. This allows to flow to be triggered by an incoming prompt from a user or application.
- The MCP Tools component with the weather MCP server is connected to the Agent component's Tools port. The agent may not use this server for every request; the agent only uses this connection if it decides the server can help respond to the prompt.
- The Agent component's Output port is connected to the Chat Output component, which returns the final response to the user or application.
-
To test the weather MCP server, click Playground, and then ask the LLM
Is it safe to go hiking in the Adirondacks today?The Playground shows you the agent's logic as it analyzes the request and select tools to use.
Ideally, the agent's response will be more specific than the previous response because of the additional context provided by the weather MCP server. For example:
The current weather in Lake Placid, a central location in the Adirondacks,
is foggy with a temperature of 17.2°C (about 63°F).
If you plan to go hiking today, be cautious as fog can reduce visibility
on trails and make navigation more difficult.
This is a better response, but what makes this MCP server more valuable than just calling a weather API?
MCP servers are often customized for specific tasks, such as highly specialized actions or chained tools for complex, multi-step problem solving. Typically, you would have to write a custom script for a specific task, possibly including multiple API calls in a single script, and then you would have to either execute this script outside the context of the agent or provide it to your agent in some way.
Instead, the MCP ensures that all MCP servers are added to agents in the same way, without having to know each server's specific endpoint structures or write custom integrations. The MCP is a standardized way to integrate many diverse tools into agentic applications. You don't have to learn a new API or write custom code every time you want to use a new MCP server.
Additionally, you can attach many MCP servers to one agent, depending on the problems you want your application to solve. The more servers you add, the more specialized context the agent can use in its responses. In this tutorial, adding the weather MCP server already improved the quality of the LLM's response. In the next section of the tutorial, you will add a
ip_geolocationMCP server so the agent can detect the user's location if they don't specify a location in their prompt.
Add a geolocation server
The Toolkit MCP server includes multiple MCP tools for network monitoring, including IP geolocation. It isn't extremely precise, but it doesn't require an API key.
Note that this tool returns the IP geolocation of your Langflow server, so if your server is deployed remotely, consider alternative approaches for getting user-specific location data, such as browser geolocation APIs.
This MCP server can be started with one npx command, which downloads and runs the Toolkit MCP server Node registry package without installing the package locally.
To add the Toolkit MCP server to your flow, do the following:
-
Open the MCP sidebar, click Add MCP Server, and register a second server.
-
Select STDIO.
-
For Name, enter
ip_geolocation.tipThe tool name and description help the agent select tools. If your agent is struggling to select tools, make sure the names and descriptions are clear and human-readable.
-
For Command, enter
npx @cyanheads/toolkit-mcp-server. -
Click Add Server, and then wait for the Actions list to populate. This means that the MCP server successfully connected.
-
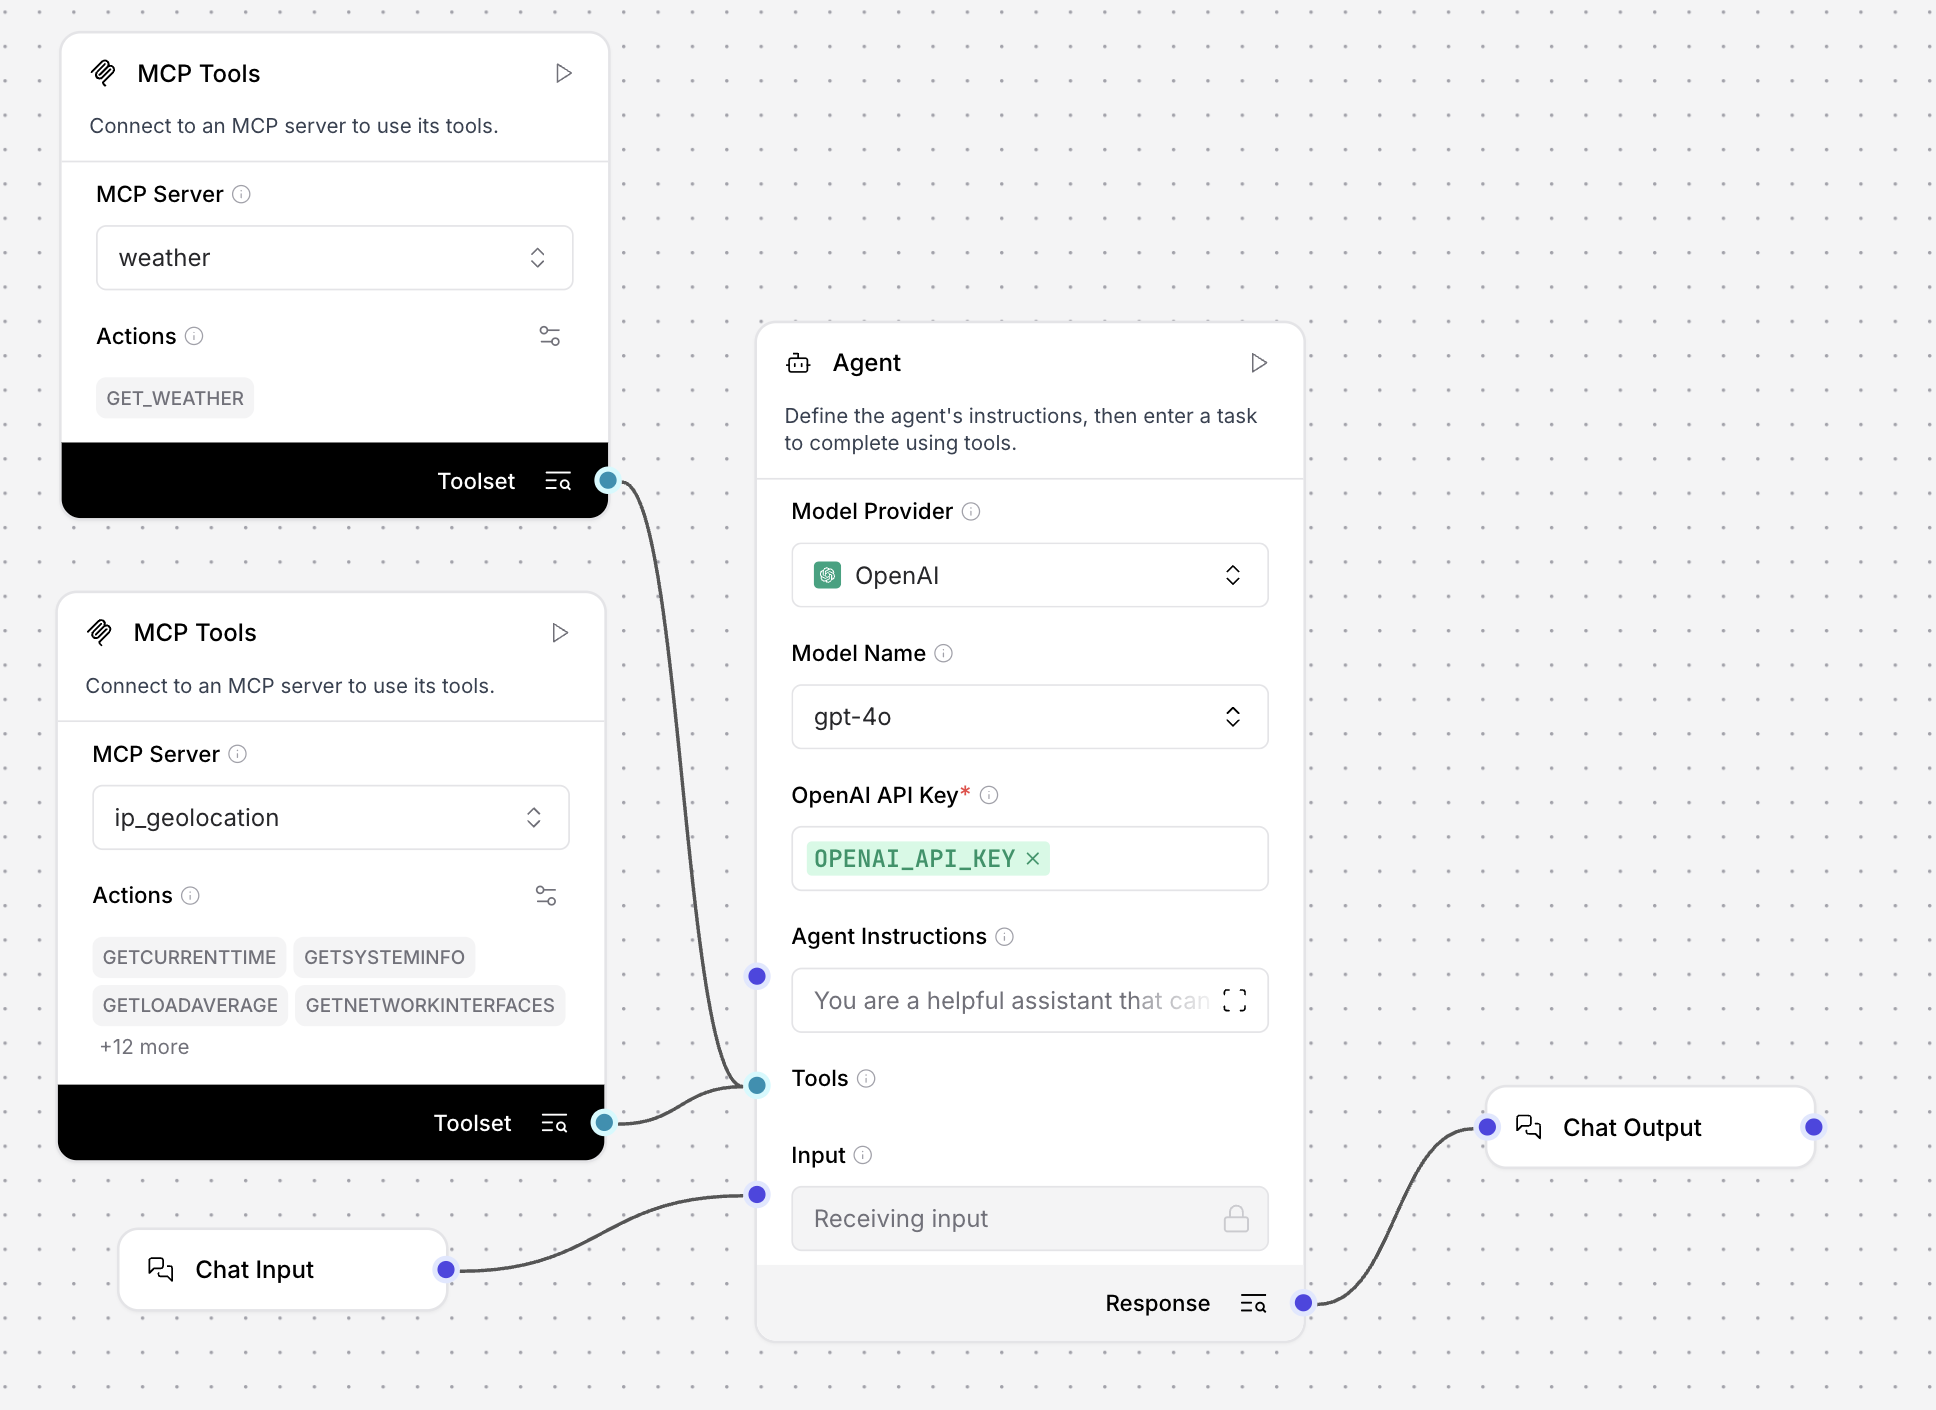
Drag the ip_geolocation MCP server from the MCP sidebar to the canvas to add the second MCP Tools component.
-
Click the new MCP Tools component, enable Tool Mode in the component's header menu, and then connect the component's Toolset port to the Agent component's Tools port.
Your flow now has an additional MCP Tools component for a total of five components.
Create a Python application that connects to Langflow
At this point, you can open the Playground and ask about the weather in your current location to test the IP geolocation tool. However, geolocation tools are most useful in applications where you or your users want to ask about the weather from different places around the world.
In the last part of this tutorial, you'll learn how to use the Langflow API to run a flow in a script. This could be part of a larger application, such as a mobile app where users want to know if the weather is good for a particular sport.
When you use the Langflow API to run a flow, you can change some aspects of the flow without changing the code. For example, you can add more MCP servers to your flow in Langflow, and then use the same script to run the flow. You can use the same input or a new input that prompts the agent to use other tools.
-
For this tutorial's Python script, gather the following information:
LANGFLOW_SERVER_ADDRESS: Your Langflow server's domain. The default value is127.0.0.1:7860. You can get this value from the code snippets on your flow's API access pane.FLOW_ID: Your flow's UUID or custom endpoint name. You can get this value from the code snippets on your flow's API access pane.LANGFLOW_API_KEY: A valid Langflow API key.
-
Copy the following script into a Python file, and then replace the placeholders with the information you gathered in the previous step:
import requests
import os

url = "LANGFLOW_SERVER_ADDRESS/api/v1/run/FLOW_ID"  # The complete API endpoint URL for this flow

# Request payload configuration
payload = {
    "output_type": "chat",
    "input_type": "chat",
    "input_value": "What's the weather like where I am right now?"
}

# Request headers
headers = {
    "Content-Type": "application/json",
    "x-api-key": "LANGFLOW_API_KEY"
}

try:
    # Send API request
    response = requests.request("POST", url, json=payload, headers=headers)
    response.raise_for_status()  # Raise exception for bad status codes

    # Parse and print only the message text
    data = response.json()
    message = data["outputs"][0]["outputs"][0]["results"]["message"]["text"]
    print(message)

except requests.exceptions.RequestException as e:
    print(f"Error making API request: {e}")
except ValueError as e:
    print(f"Error parsing response: {e}")
except (KeyError, IndexError) as e:
    print(f"Error extracting message from response: {e}")
Notice that this script uses a different prompt than the previous Playground examples. In this script, the
input_valueasks about the weather in the user's current location without providing any hints about the user's location, such as a particular city.Additionally, this script includes parsing code to extract the LLM's reply from the entire Langflow API response. You will want to use similar extraction in your own applications because the Langflow API response includes metadata and other information that isn't relevant to the reply passed to the user.
-
Save and run the script to send the request and test the flow.
The agent uses the
ip_geolocationtool to detect the requester's location, and then it uses theweathertool to retrieve weather information for that location. For example:The weather in Waynesboro, Pennsylvania, is currently overcast with a temperature of 23.0°C (about 73.4°F).
If you need more details or have any other questions, feel free to ask!Remember, the
ip_geolocationtool used in this tutorial uses your Langflow server's location, which can be different from your actual location.
Next steps
To continue building on the concepts introduced in this tutorial, see the following:
Was this page helpful?