Connect applications to agents
This tutorial shows you how to connect a JavaScript application to a Langflow agent.
With an agent, your application can use any connected tools to retrieve more contextual and timely data without changing any application code. The tools are selected by the agent's internal LLM to solve problems and answer questions.
Prerequisites
- Install and start Langflow
- Create a Langflow API key
- Install the Langflow JavaScript client
- Create an OpenAI API key
This tutorial uses an OpenAI LLM. If you want to use a different provider, you need a valid credential for that provider.
Create an agent flow
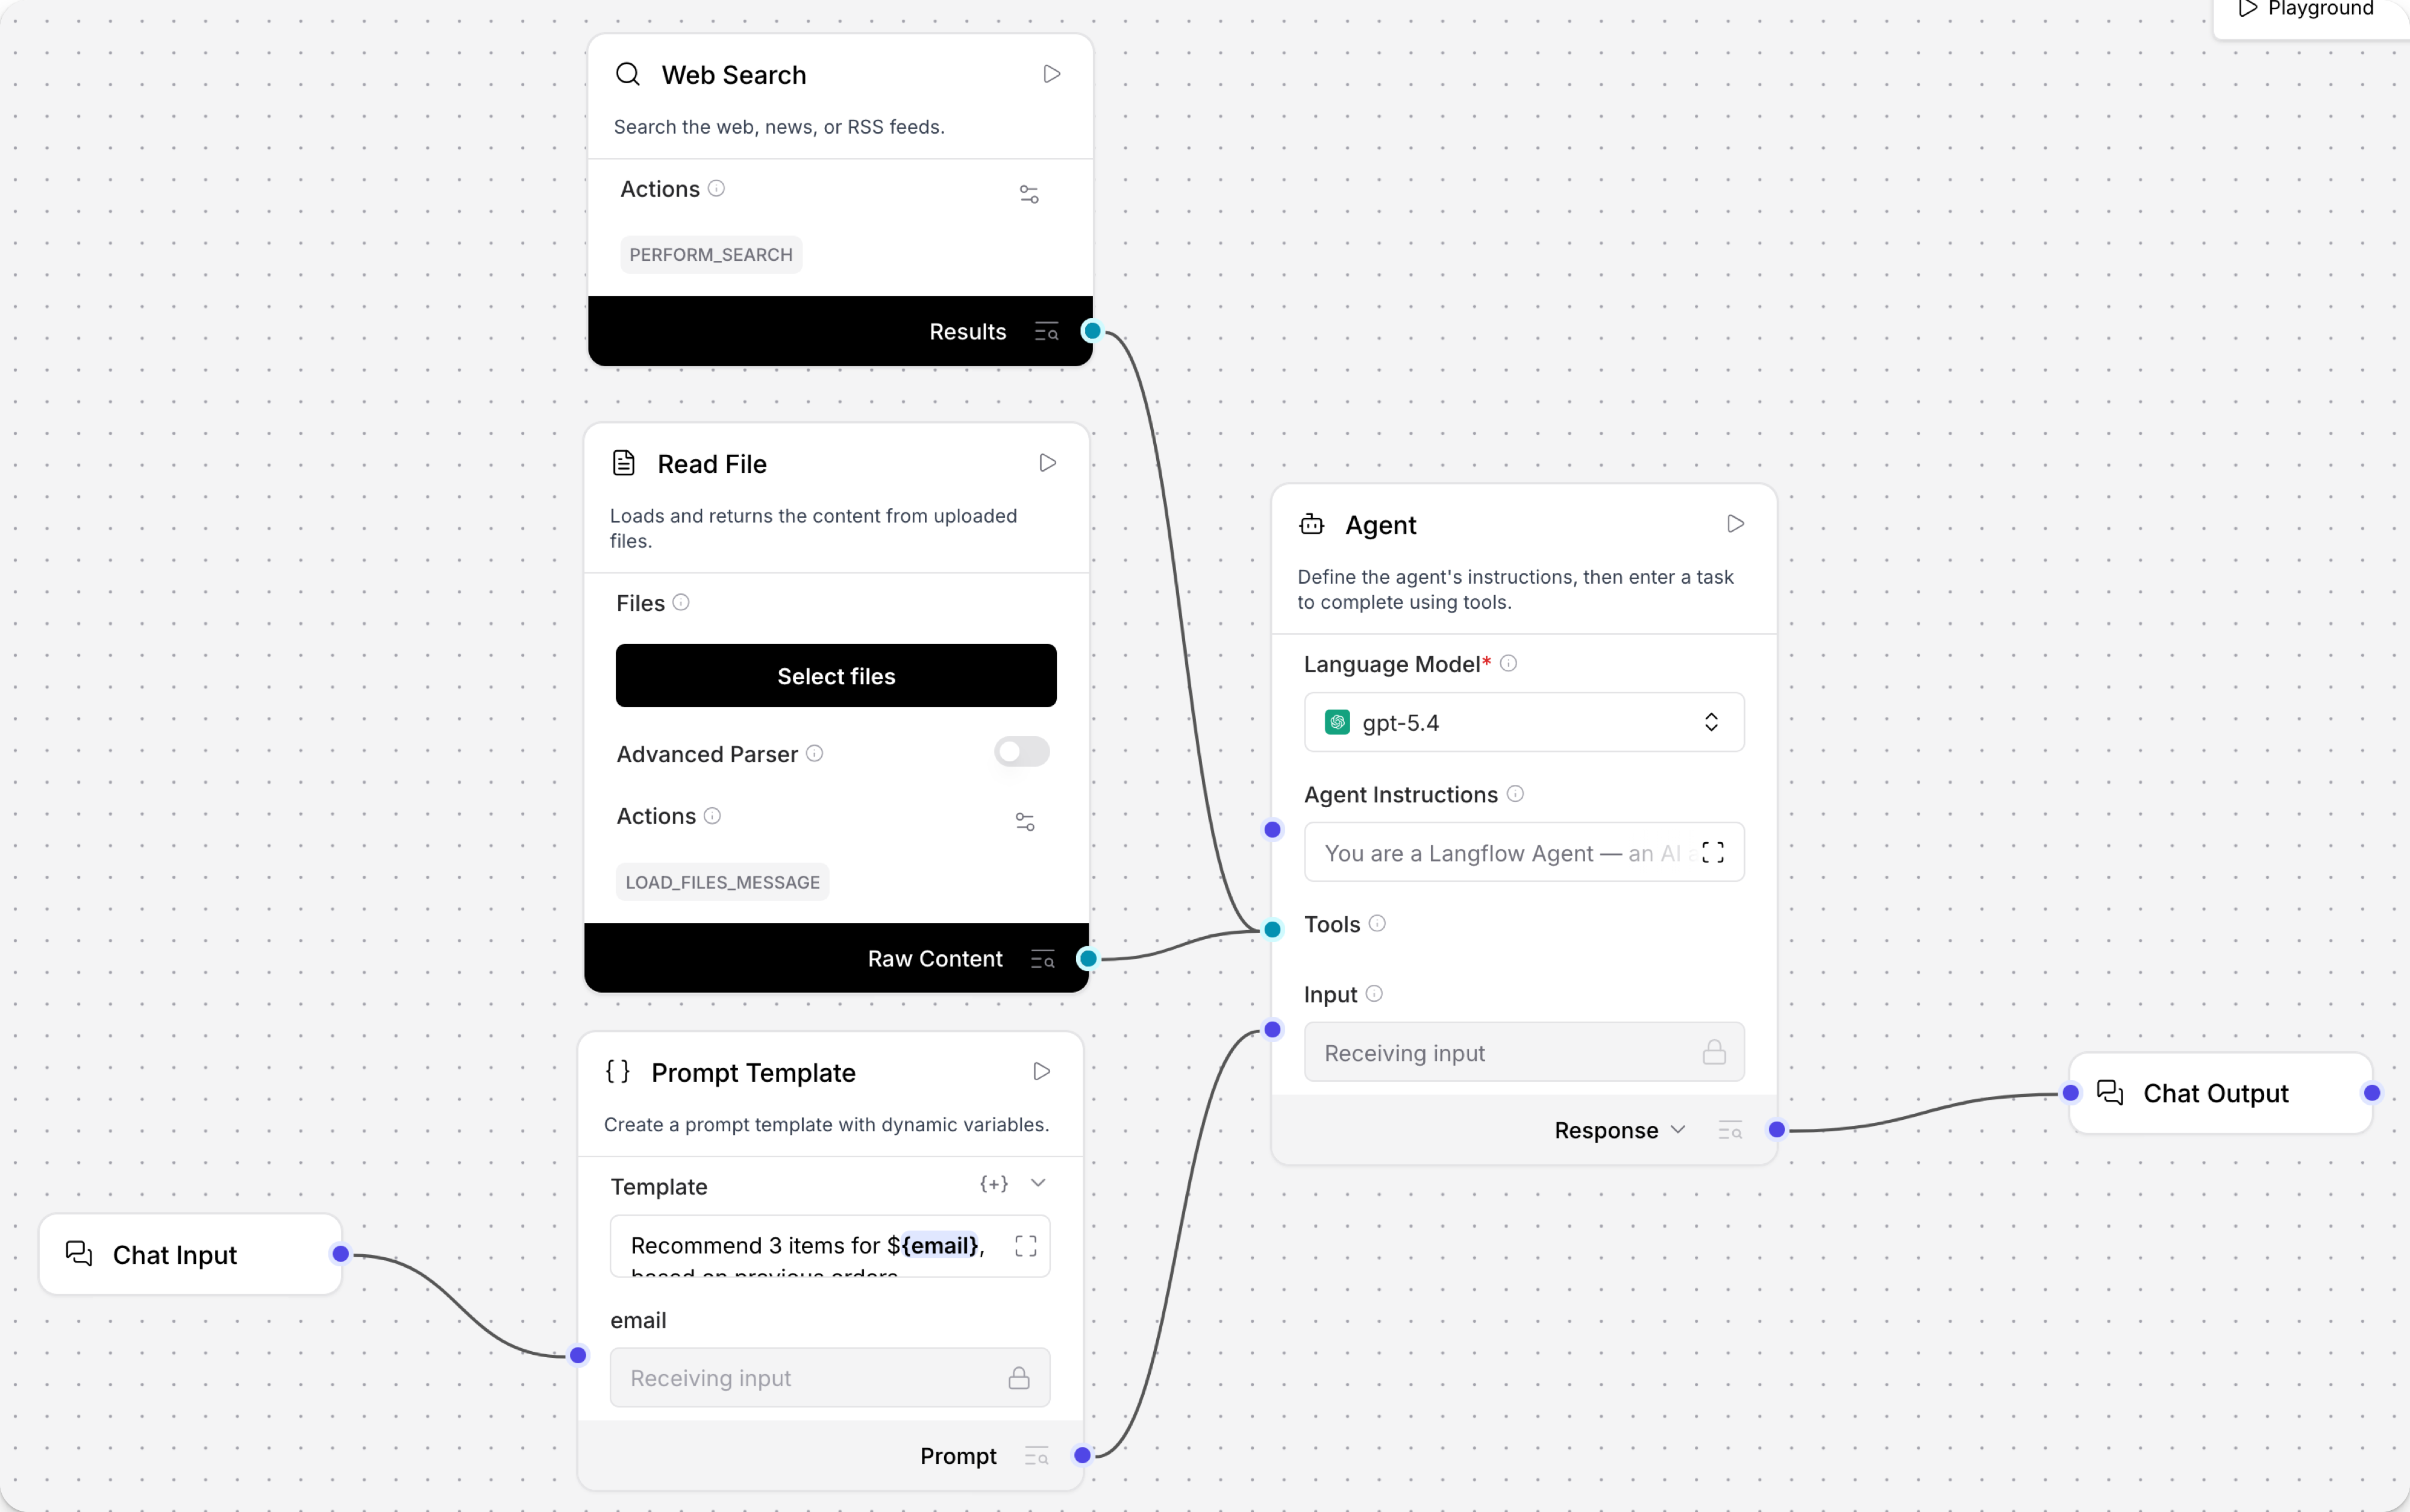
The following steps modify the Simple Agent template to connect a Read File component and a Web Search component as tools for an Agent component. The Read File component loads a file you upload to Langflow, and the Web Search component performs a DuckDuckGo search. When connected to an Agent component as tools, the agent has the option to use these components when handling requests.
-
In Langflow, click New Flow, and then select the Simple Agent template.
-
Remove the URL and Calculator tools, and then add Read File and Web Search components to your flow.
-
In the Read File component, upload the file you want to make available to the Agent component.
In this tutorial, the agent needs access to a record of customer purchases. You can adapt the tutorial to suit your data, or, to follow along with the tutorial, you can download
customer-orders.csv. Uploadcustomer-orders.csvto the Read File component by clicking the file upload field and selecting the file. Later in this tutorial, the agent will be prompted to findemailvalues in the customer data. -
In the Read File and Web Search components' header menus, enable Tool Mode so you can use the components with an agent.
-
Connect the Read File and Web Search components' Toolset ports to the Agent component's Tools port.
-
In the Agent component, enter your OpenAI API key.
If you want to use a different provider or model, edit the Model Provider, Model Name, and API Key fields accordingly.
-
To test the flow, click Playground, and then ask the LLM a question, such as
Recommend 3 used items for carol.davis@example.com, based on previous orders.Given the example prompt, the LLM would respond with recommendations and web links for items based on previous orders in
customer_orders.csv.The Playground prints the agent's chain of thought as it selects tools to use and interacts with functionality provided by those tools. For example, the agent can use the Read File component to load the CSV data, and the Web Search component's
perform_searchtool to find links to related items.
Add a Prompt Template component to the flow
In this example, the application sends a customer's email address to the Langflow agent. The agent reads the customer's previous orders from the Read File component, searches the web for used versions of those items, and returns three results.
-
To include the email address as a value in your flow, add a Prompt Template component to your flow between the Chat Input and Agent components.
-
In the Prompt Template component's Template field, enter
Recommend 3 used items for {email}, based on previous orders.Adding the{email}value in curly braces creates a new input in the Prompt Template component, and the component connected to the{email}port is supplying the value for that variable. This creates a point for the user's email to enter the flow from your request. If you aren't using thecustomer_orders.csvexample file, modify the input to search for a value in your dataset.At this point your flow has six components. The Chat Input component is connected to the Prompt Template component's email input port. Then, the Prompt Template component's output is connected to the Agent component's System Message input port. The Read File and Web Search components are connected to the Agent component's Tools port. Finally, the Agent component's output is connected to the Chat Output component, which returns the final response to the application.
Send requests to your flow from a JavaScript application
With your flow operational, connect it to a JavaScript application to use the agent's responses.
-
To construct a JavaScript application to connect to your flow, gather the following information:
LANGFLOW_SERVER_ADDRESS: Your Langflow server's domain. The default value is127.0.0.1:7860. You can get this value from the code snippets on your flow's API access pane.FLOW_ID: Your flow's UUID or custom endpoint name. You can get this value from the code snippets on your flow's API access pane.LANGFLOW_API_KEY: A valid Langflow API key.
-
Copy the following script into a JavaScript file, and then replace the placeholders with the information you gathered in the previous step. If you're using the
customer_orders.csvexample file, you can run this example as-is with the example email address in the code sample. If not, modify theconst email = "isabella.rodriguez@example.com"to search for a value in your dataset.import { LangflowClient } from "@datastax/langflow-client";
const LANGFLOW_SERVER_ADDRESS = 'LANGFLOW_SERVER_ADDRESS';
const FLOW_ID = 'FLOW_ID';
const LANGFLOW_API_KEY = 'LANGFLOW_API_KEY';
const email = "isabella.rodriguez@example.com";
async function runAgentFlow(): Promise<void> {
try {
// Initialize the Langflow client
const client = new LangflowClient({
baseUrl: LANGFLOW_SERVER_ADDRESS,
apiKey: LANGFLOW_API_KEY
});
console.log(`Connecting to Langflow server at: ${LANGFLOW_SERVER_ADDRESS} `);
console.log(`Flow ID: ${FLOW_ID}`);
console.log(`Email: ${email}`);
// Get the flow instance
const flow = client.flow(FLOW_ID);
// Run the flow with the email as input
console.log('\nSending request to agent...');
const response = await flow.run(email, {
session_id: email // Use email as session ID for context
});
console.log('\n=== Response from Langflow ===');
console.log('Session ID:', response.sessionId);
// Extract URLs from the chat message
const chatMessage = response.chatOutputText();
console.log('\n=== URLs from Chat Message ===');
const messageUrls = chatMessage.match(/https?:\/\/[^\s"')\]]+/g) || [];
const cleanMessageUrls = [...new Set(messageUrls)].map(url => url.trim());
console.log('URLs from message:');
cleanMessageUrls.slice(0, 3).forEach(url => console.log(url));
} catch (error) {
console.error('Error running flow:', error);
// Provide error messages
if (error instanceof Error) {
if (error.message.includes('fetch')) {
console.error('\nMake sure your Langflow server is running and accessible at:', LANGFLOW_SERVER_ADDRESS);
}
if (error.message.includes('401') || error.message.includes('403')) {
console.error('\nCheck your API key configuration');
}
if (error.message.includes('404')) {
console.error('\nCheck your Flow ID - make sure it exists and is correct');
}
}
}
}
// Run the function
console.log('Starting Langflow Agent...\n');
runAgentFlow().catch(console.error); -
Save and run the script to send the request and test the flow.
Your application receives three URLs for recommended used items based on a customer's previous orders in your local CSV, all without changing any code.
Result
The following is an example response from this tutorial's flow. Due to the nature of LLMs and variations in your inputs, your response might be different.
Starting Langflow Agent...

Connecting to Langflow server at: http://localhost:7860
Flow ID: local-db-search
Email: isabella.rodriguez@example.com

Sending request to agent...

=== Response from Langflow ===
Session ID: isabella.rodriguez@example.com

URLs found:
https://www.facebook.com/marketplace/258164108225783/electronics/
https://www.facebook.com/marketplace/458332108944152/furniture/
https://www.facebook.com/marketplace/613732137493719/kitchen-cabinets/ -
To quickly check traffic to your flow, open the Playground. New sessions are named after the user's email address. Keeping sessions distinct helps the agent maintain context. For more on session IDs, see Session ID.
Next steps
For more information on building or extending this tutorial, see the following:
Was this page helpful?