Blog Writer
warning
This page may contain outdated information. It will be updated as soon as possible.
Build a blog writer with OpenAI that uses URLs for reference content.
Prerequisites
Create the Blog Writer project
- From the Langflow dashboard, click New Project.
- Select Blog Writer.
- The Blog Writer flow is created.
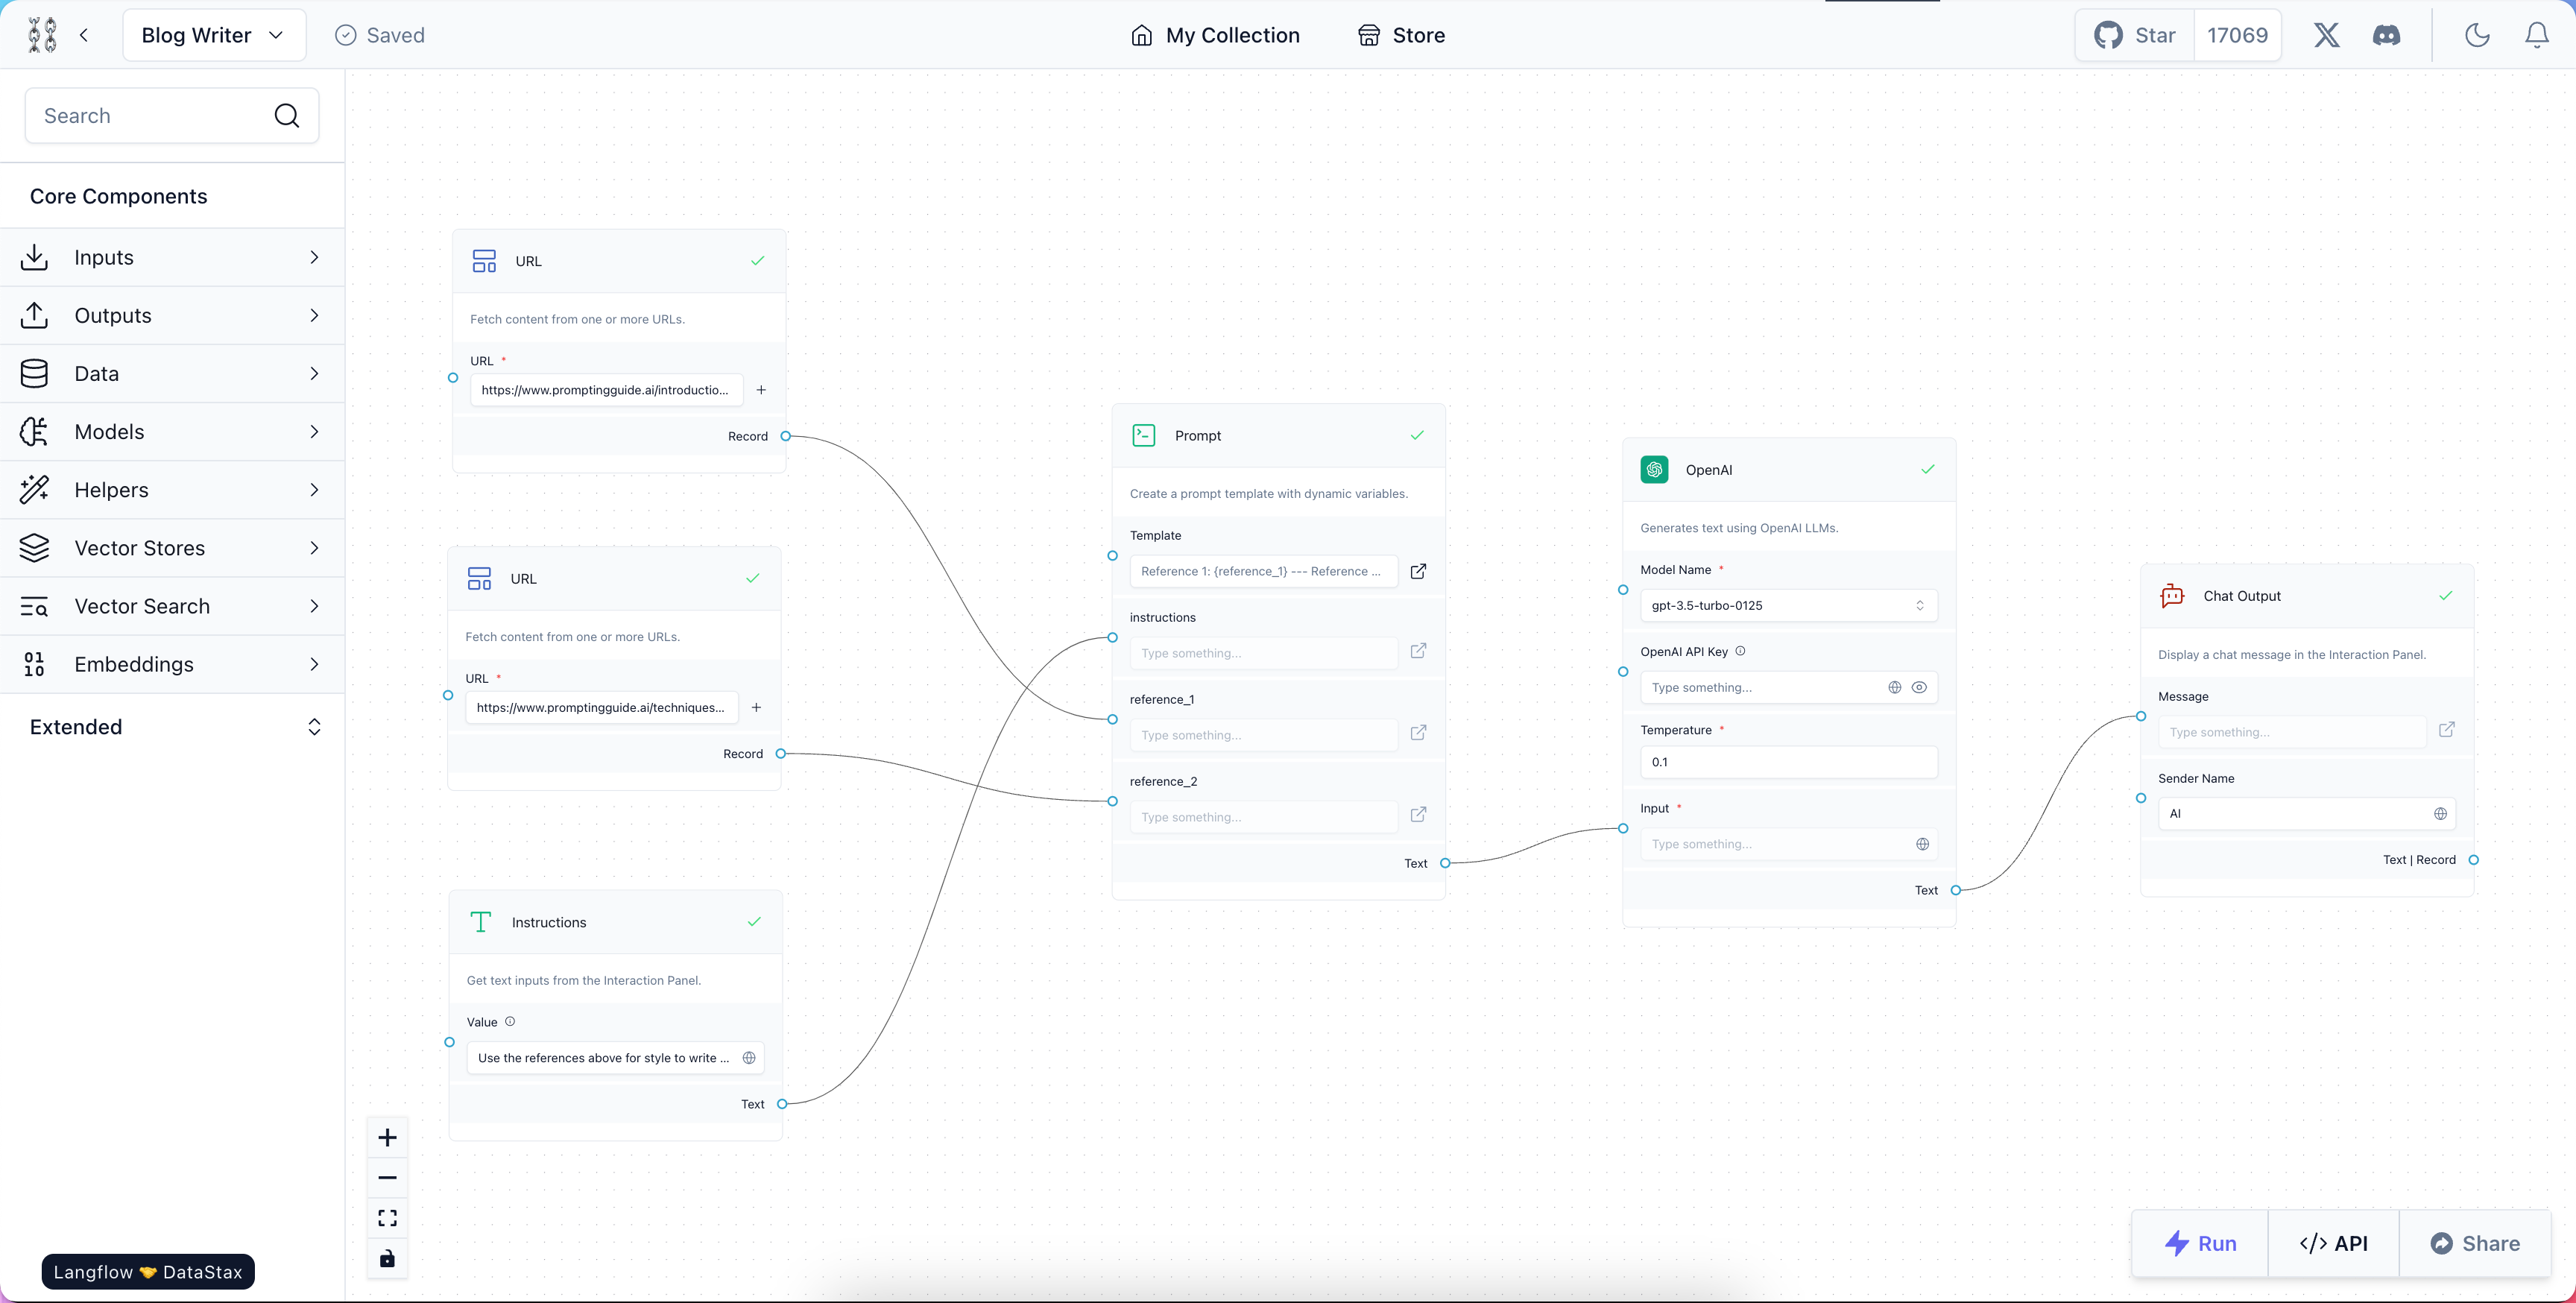
This flow creates a one-shot prompt flow with Prompt, OpenAI, and Chat Output components, and augments the flow with reference content and instructions from the URL and Instructions components.
The Prompt component's default Template field looks like this:
_15Reference 1:_15_15{reference_1}_15_15---_15_15Reference 2:_15_15{reference_2}_15_15---_15_15{instructions}_15_15Blog:
The {instructions} value is received from the Value field of the Instructions component.
The reference_1 and reference_2 values are received from the URL fields of the URL components.
- To create an environment variable for the OpenAI component, in the OpenAI API Key field, click the Globe button, and then click Add New Variable.
- In the Variable Name field, enter
openai_api_key. - In the Value field, paste your OpenAI API Key (
sk-...). - Click Save Variable.
- In the Variable Name field, enter
Run the Blog Writer flow
- Click the Run button. The Interaction Panel opens, where you can run your one-shot flow.
- Click the Lighting Bolt icon to run your flow.
- The OpenAI component constructs a blog post with the URL items as context.
The default URL values are for web pages at
promptingguide.ai, so your blog post will be about prompting LLMs.
To write about something different, change the values in the URL components, and see what the LLM constructs.